If you’re looking to install a one way light switch in your home, you may be wondering how to wire it correctly. Understanding the wiring diagram is crucial to ensure that your light switch works properly.
When it comes to wiring a one way light switch, it’s important to follow the correct diagram to avoid any electrical issues. By following the right steps, you can easily install your light switch and have it working in no time.

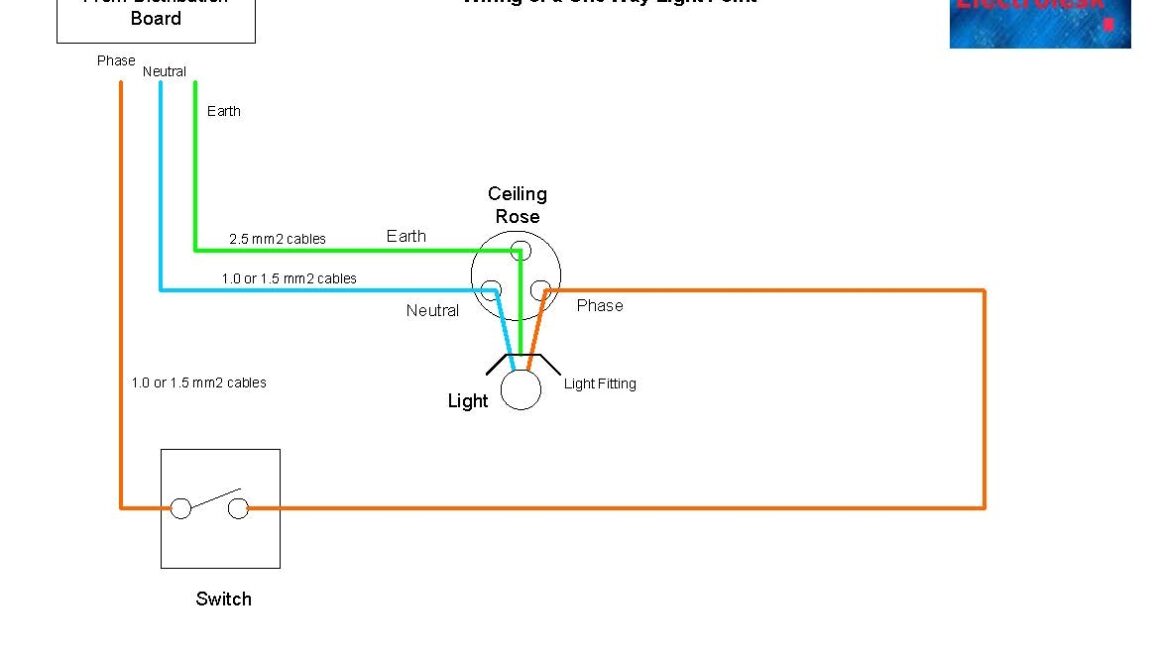
1 Way Light Switch Wiring Diagram
The wiring diagram for a one way light switch is relatively simple. You will need to connect the live wire to the common terminal, the neutral wire to the neutral terminal, and the switched live wire to the L1 terminal. It’s important to turn off the power before starting the installation process.
Once you have identified the correct wires, you can start connecting them to the appropriate terminals on the light switch. Make sure to secure the wires tightly to avoid any loose connections. Once everything is connected, you can turn the power back on and test the switch to ensure it is working correctly.
If you’re unsure about how to wire a one way light switch, it’s always best to consult a professional electrician. They can provide you with guidance and ensure that the installation is done safely and correctly. Safety should always be a top priority when working with electricity.
By following the correct wiring diagram and taking the necessary precautions, you can easily install a one way light switch in your home. With a little bit of knowledge and effort, you can have your new light switch up and running in no time.
In conclusion, wiring a one way light switch is a straightforward process as long as you follow the correct diagram and take the necessary safety precautions. By understanding the wiring and following the steps carefully, you can successfully install your light switch and enjoy a well-lit room in no time.
Download and Print 1 Way Light Switch Wiring Diagram Listed below


