Ever wondered how to wire up your Ezgo golf cart but didn’t know where to start? Well, you’re in luck because in this article, we’re going to break down the process for you step by step.
Whether you’re a seasoned golf cart enthusiast or a newbie looking to customize your ride, understanding the wiring diagram is key to ensuring everything runs smoothly.

Related Post Car Stereo Radio Wiring Diagram
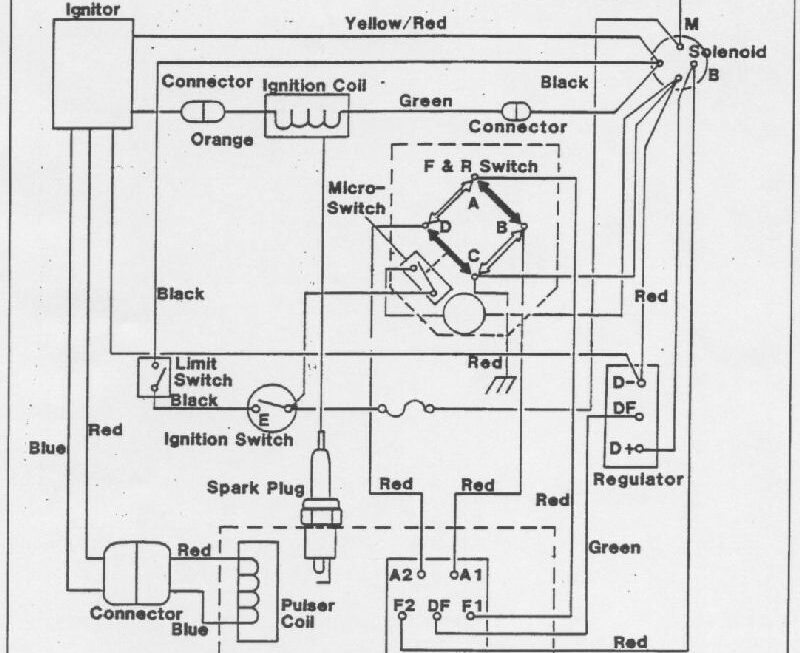
Start by locating the battery compartment on your Ezgo golf cart and identifying the positive and negative terminals. This will serve as your starting point for connecting the various components of the cart.
Refer to the wiring diagram to identify the different wires and their corresponding connections. Take your time to ensure each wire is properly connected to the right terminal to avoid any electrical mishaps down the road.
Once you’ve completed the wiring process, test your Ezgo golf cart to ensure everything is functioning as it should. Check the lights, horn, and any other electrical components to make sure they are working properly.
In conclusion, wiring your Ezgo golf cart may seem daunting at first, but with the right guidance and a bit of patience, you’ll have your ride up and running in no time. Just remember to refer back to the wiring diagram whenever you’re in doubt, and you’ll be cruising around the golf course in style!
Download and Print Ezgo Golf Cart Wiring Diagram Listed below