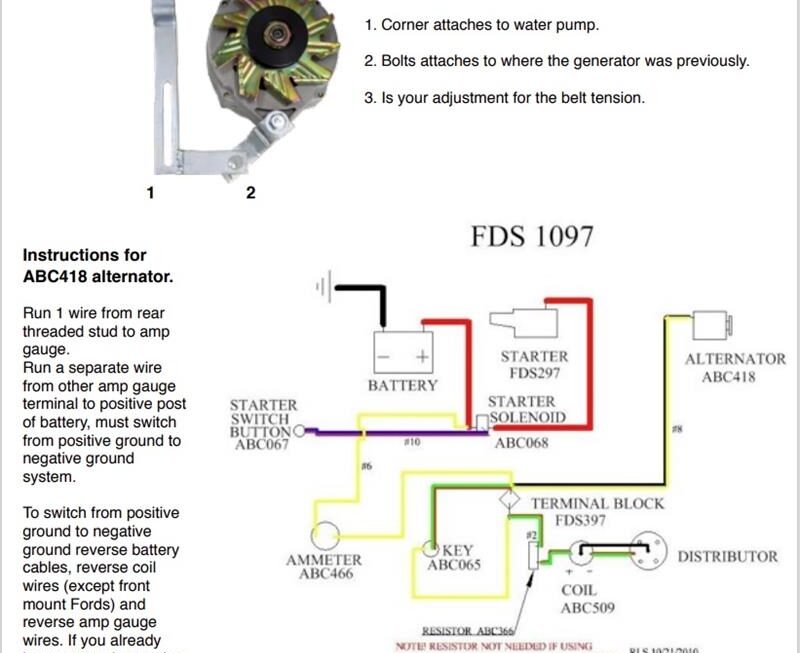
If you’re looking to upgrade your vehicle’s charging system, a 1 wire alternator may be just what you need. With its simplified wiring and increased efficiency, a 1 wire alternator is a popular choice among car enthusiasts.
Installing a 1 wire alternator is a straightforward process that can be done with basic tools and some know-how. To help you get started, we’ve put together a simple wiring diagram to guide you through the installation process.

Related Post 50 Amp Rv Outlet Wiring Diagram
Next, connect the ignition switch wire to the “field” terminal of the alternator. This will allow the alternator to start charging as soon as the engine is running. Make sure to use a fusible link or fuse to protect the wiring in case of a short circuit.
Finally, connect the alternator’s ground terminal to a clean, unpainted part of the engine block or chassis. This will provide a solid ground connection for the alternator to function properly. Once everything is connected, double-check your wiring to ensure everything is secure and properly insulated.
With the wiring complete, you can now start your engine and test the alternator’s charging output. Use a multimeter to check the voltage at the battery terminals. If everything is working correctly, you should see a voltage reading of around 13-14 volts, indicating that the alternator is charging the battery.
By following this simple wiring diagram, you can easily install a 1 wire alternator in your vehicle and enjoy the benefits of improved charging efficiency. Whether you’re upgrading an old vehicle or customizing a classic car, a 1 wire alternator is a great choice for any automotive enthusiast.
Upgrade your vehicle’s charging system with a 1 wire alternator and enjoy improved efficiency and performance on the road. With our easy-to-follow wiring diagram, you’ll have your new alternator up and running in no time. Give your car the power it deserves with a 1 wire alternator upgrade today!
Download and Print 1 Wire Alternator Wiring Diagram Listed below