Are you looking to set up a 12 24 volt trolling motor but feeling a bit overwhelmed by the wiring process? Don’t worry, we’ve got you covered! Understanding how to properly wire your trolling motor is essential for smooth operation out on the water.
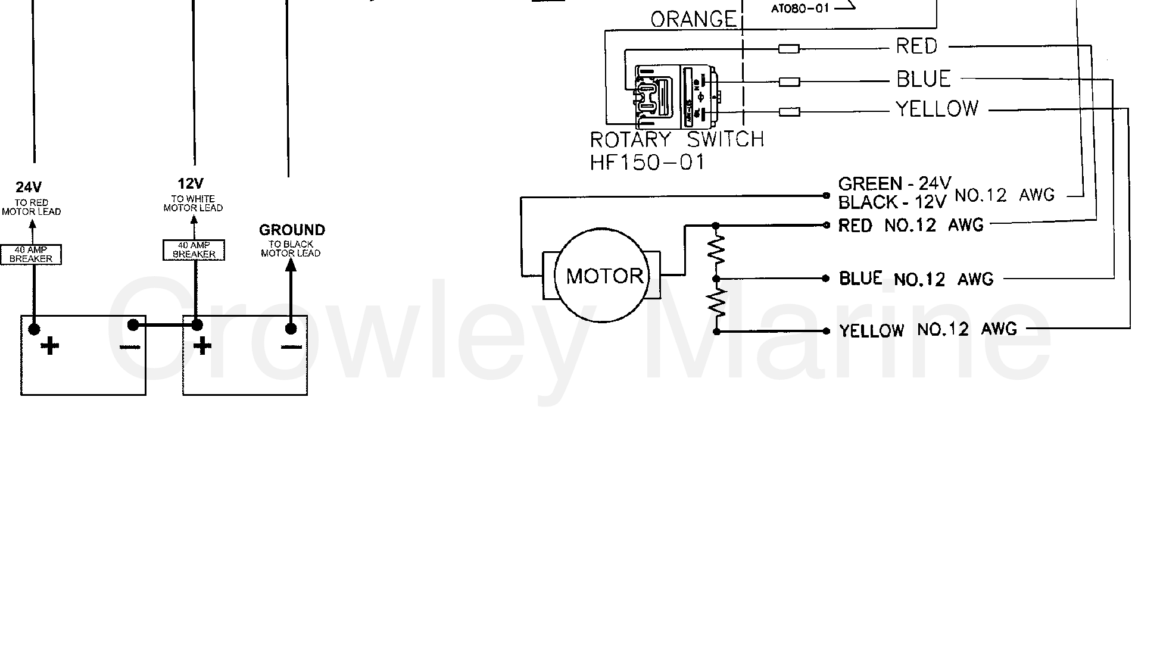
When it comes to wiring a 12 24 volt trolling motor, having a clear diagram to follow can make the process much easier. By following a wiring diagram, you can ensure that all the connections are made correctly and that your motor will run efficiently.

Related Post Wiring Diagram Three Phase Motor
Next, you’ll want to carefully study the wiring diagram for your specific trolling motor model. This diagram will show you how to connect the batteries, motor, and any other components in the correct sequence. Following the diagram step by step is crucial to avoid any mistakes.
Once you have a good understanding of the wiring diagram, you can start making the connections. It’s important to pay close attention to details such as wire color coding and terminal connections to ensure everything is done correctly. Taking your time during this step will save you headaches later on.
After all the connections have been made, it’s a good idea to test the trolling motor to make sure everything is working as it should. This will give you the opportunity to troubleshoot any issues before hitting the water. Once you’ve confirmed that the motor is running smoothly, you’re ready to enjoy your time on the lake!
In conclusion, wiring a 12 24 volt trolling motor may seem daunting at first, but with the right tools and a clear diagram, it can be a straightforward process. By following the steps outlined in this article and taking your time to ensure accuracy, you’ll have your motor up and running in no time. Happy fishing!
Download and Print 12 24 Volt Trolling Motor Wiring Diagram Listed below