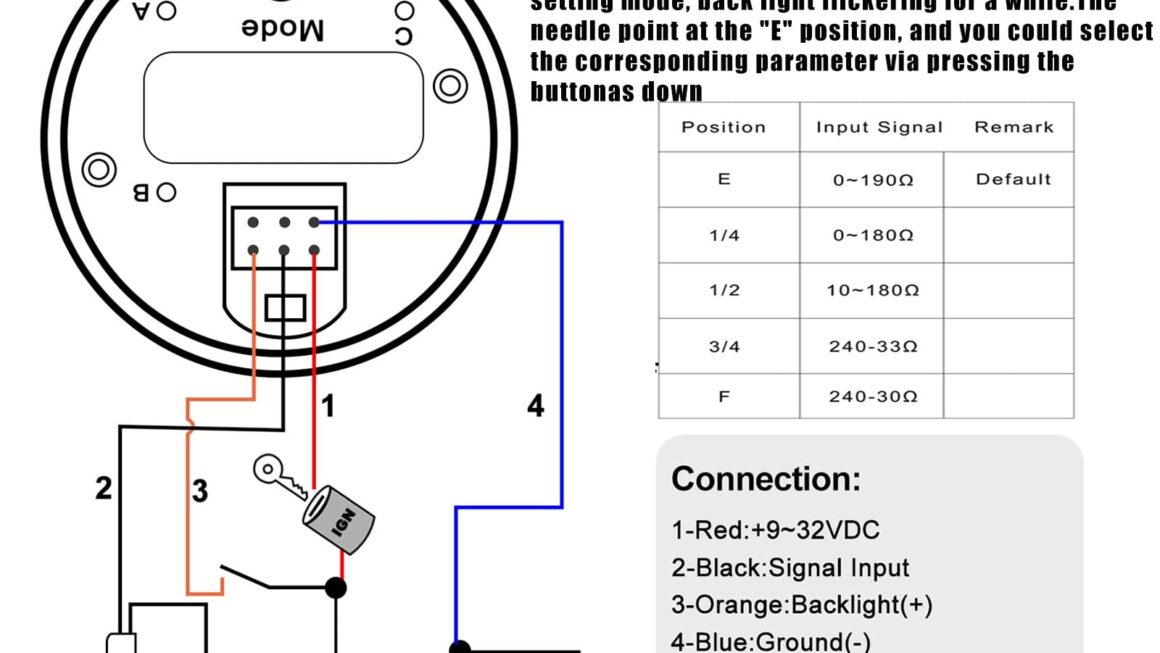
Are you looking to install a fuel gauge on your boat but not sure where to start? Understanding the wiring diagram is key to a successful installation. In this article, we will walk you through the process of wiring a 12 volt fuel gauge for your boat.
Before diving into the wiring diagram, it’s important to gather all the necessary tools and materials. You will need a fuel gauge, wiring harness, crimping tool, wire strippers, and electrical tape. Make sure to also have a clear understanding of your boat’s electrical system.

Related Post Wiring Diagram For A Western Plow
Using your wire strippers, strip the ends of the wires on the new wiring harness. Connect the positive wire to the positive terminal on the fuel gauge and the negative wire to the negative terminal. Make sure to secure the connections using a crimping tool.
Once the connections are secure, use electrical tape to wrap around the exposed wires for added protection. Double-check all connections to ensure everything is properly connected. Finally, test the fuel gauge to make sure it is working correctly before securing it back in place.
By following this simple wiring diagram, you can easily install a 12 volt fuel gauge on your boat. Remember to always prioritize safety when working with electrical systems. If you are unsure about any step, consult a professional to avoid any potential risks.
In conclusion, wiring a 12 volt fuel gauge for your boat is a straightforward process that can be done with the right tools and knowledge. By following the steps outlined in this article, you can successfully install a fuel gauge and keep track of your boat’s fuel levels with ease.
Download and Print 12 Volt Fuel Gauge Wiring Diagram For Boat Listed below