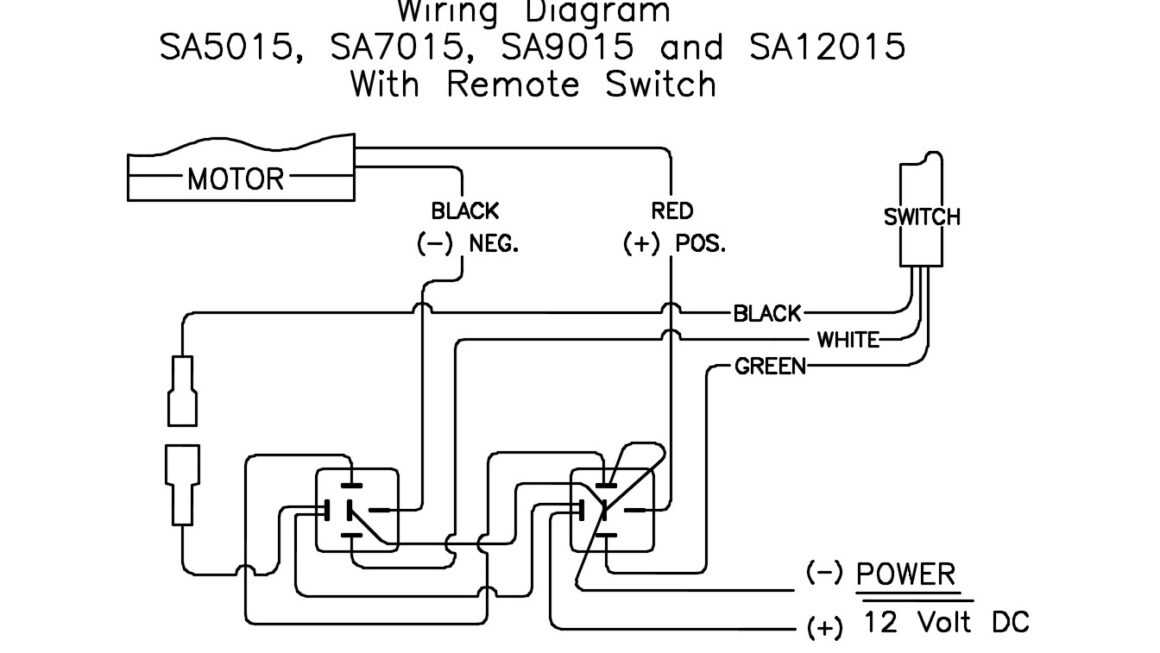
If you’re looking to install a 12 volt winch but are unsure about the wiring process, you’ve come to the right place. Understanding the 12 volt winch wiring diagram is essential for a successful installation.
Whether you’re a seasoned DIY enthusiast or a beginner, this guide will walk you through the steps needed to wire your 12 volt winch efficiently and safely.

Related Post Outlet And Switch Wiring Diagram
Start by connecting the winch solenoid to the winch motor using the provided wiring harness. Make sure to follow the manufacturer’s instructions carefully to avoid any mishaps during the installation process.
Next, connect the winch switch to the solenoid using the appropriate wires and connectors. Double-check all connections to ensure they are secure and properly insulated to prevent any electrical issues down the line.
Once all the components are connected, it’s time to mount the winch onto your vehicle using the mounting plate. Secure the winch in place according to the manufacturer’s guidelines to ensure it stays in place during operation.
Finally, test the winch to make sure it’s functioning correctly. Operate the winch in both directions to ensure it’s pulling and releasing the cable as intended. If everything is working properly, you’re all set to start using your newly installed 12 volt winch.
With this 12 volt winch wiring diagram guide, you’ll be able to tackle the installation process with confidence. Remember to take your time, follow the instructions carefully, and prioritize safety throughout the entire process. Happy winching!
Download and Print 12 Volt Winch Wiring Diagram Listed below