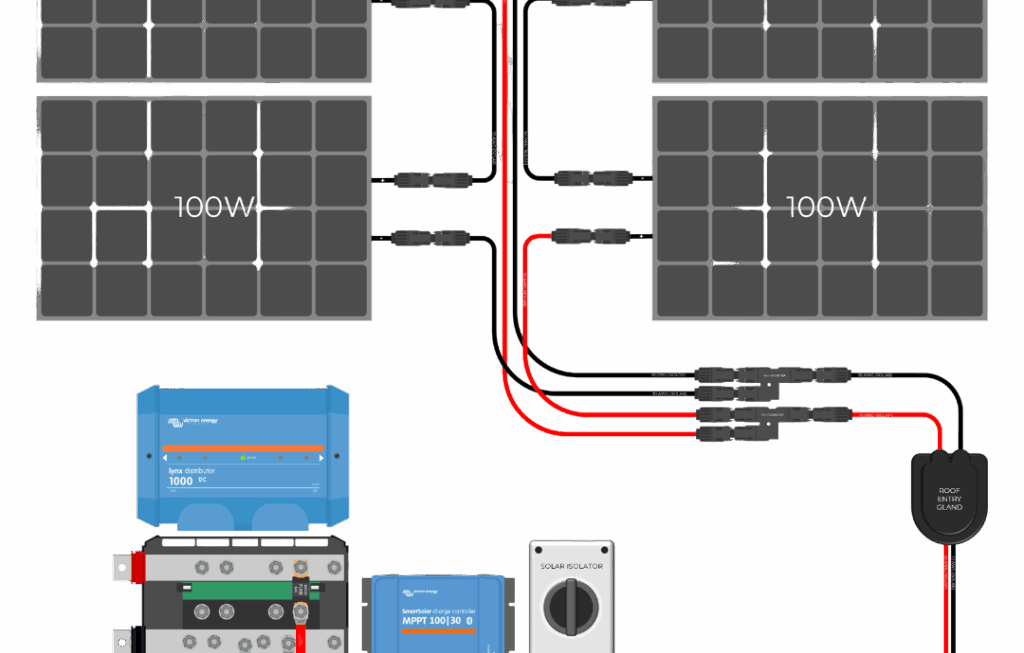
Looking to set up a solar power system for your RV or camper? One essential component you’ll need is a 12V solar panel. But how do you properly wire it to ensure maximum efficiency and power generation?
In this article, we’ll provide you with a simple and easy-to-follow 12V solar panel wiring diagram that will help you set up your solar panel system in no time.

Related Post Water Well Pump Wiring Diagram
Next, you’ll want to connect the positive (+) and negative (-) terminals of your solar panel to the corresponding terminals on the charge controller. This will regulate the flow of electricity and prevent overcharging of your battery.
Once the solar panel is connected to the charge controller, you’ll then need to wire the charge controller to your battery. Make sure to use the appropriate gauge of wire to handle the current flow and prevent any power loss.
After the battery is connected to the charge controller, you can then connect your DC loads, such as lights or appliances, to the output terminals of the charge controller. This will allow you to power your devices directly from the solar panel system.
Finally, it’s important to regularly check and maintain your solar panel system to ensure optimal performance. Clean the panels regularly, check for any loose connections, and monitor the battery voltage to prevent any issues.
By following this simple 12V solar panel wiring diagram, you’ll be able to set up your solar power system with ease and start harnessing the power of the sun to power your adventures on the road.
Download and Print 12V Solar Panel Wiring Diagram Listed below