Looking to upgrade your car audio system with a 2-channel line output converter? You’ve come to the right place! Installing a line output converter is a great way to improve the sound quality in your vehicle without having to replace the entire audio system.
Whether you’re a car audio enthusiast or just looking to enhance your driving experience, understanding how to properly wire a 2-channel line output converter is essential. In this article, we’ll walk you through the process step by step so you can enjoy crystal clear sound in no time.

Related Post Dc To Dc Charger Wiring Diagram
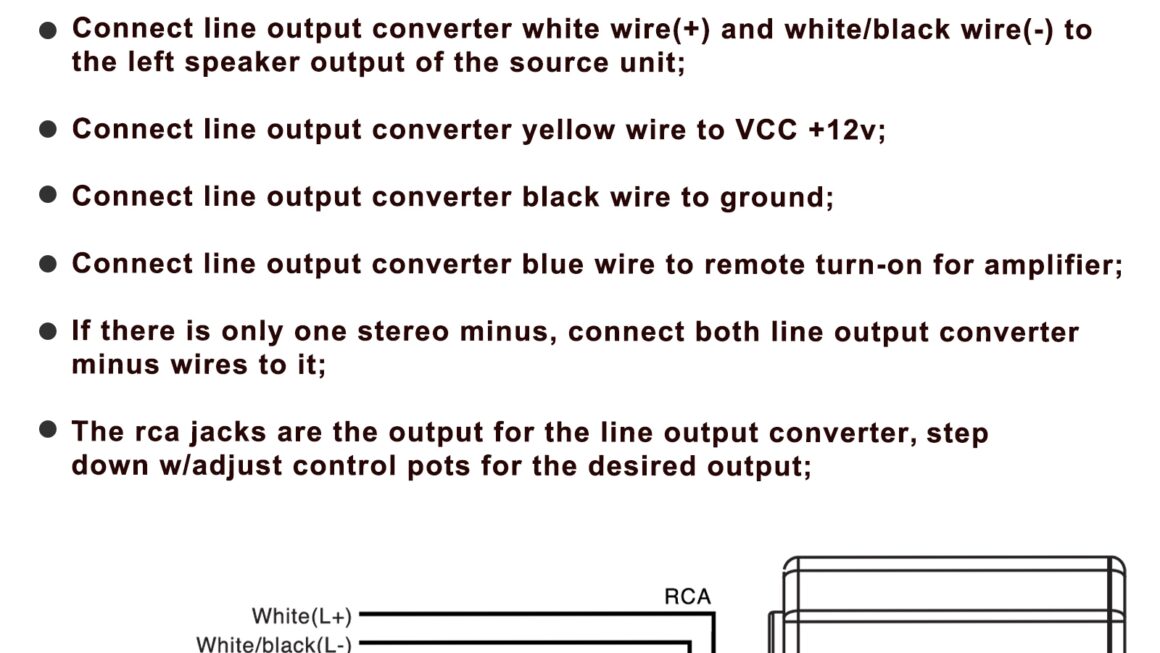
Begin by disconnecting the negative terminal of your car’s battery to prevent any electrical shorts. Locate the factory stereo unit in your vehicle and identify the speaker wires that you’ll be tapping into. Refer to the wiring diagram to ensure you’re connecting the correct wires to the line output converter.
Using your wire strippers, carefully strip the insulation off the speaker wires and the input wires of the line output converter. Connect the corresponding wires together using butt connectors or soldering, ensuring a secure and reliable connection. Use electrical tape to wrap and insulate the connections.
Once all the connections are made, reattach the negative terminal of the battery and test the audio system to ensure everything is working properly. Fine-tune the settings on the line output converter to achieve the desired sound quality, and enjoy your upgraded car audio system!
With this simple wiring diagram and a bit of patience, you can take your car audio to the next level. Whether you’re cruising down the highway or stuck in traffic, you’ll appreciate the improved sound quality that a 2-channel line output converter can provide.
Upgrade your car audio system today and experience the difference for yourself!
Download and Print 2 Channel Line Output Converter Wiring Diagram Listed below