If you’re looking to understand how to wire a lamp ballast, you’ve come to the right place! Wiring a lamp ballast can seem intimidating at first, but with the right guidance, it can be a straightforward process.
In this article, we’ll walk you through the steps to wire a lamp ballast properly. Whether you’re a DIY enthusiast or just looking to save some money on electrician fees, this guide will help you get the job done.

Related Post Diagram For Trailer Plug Wiring
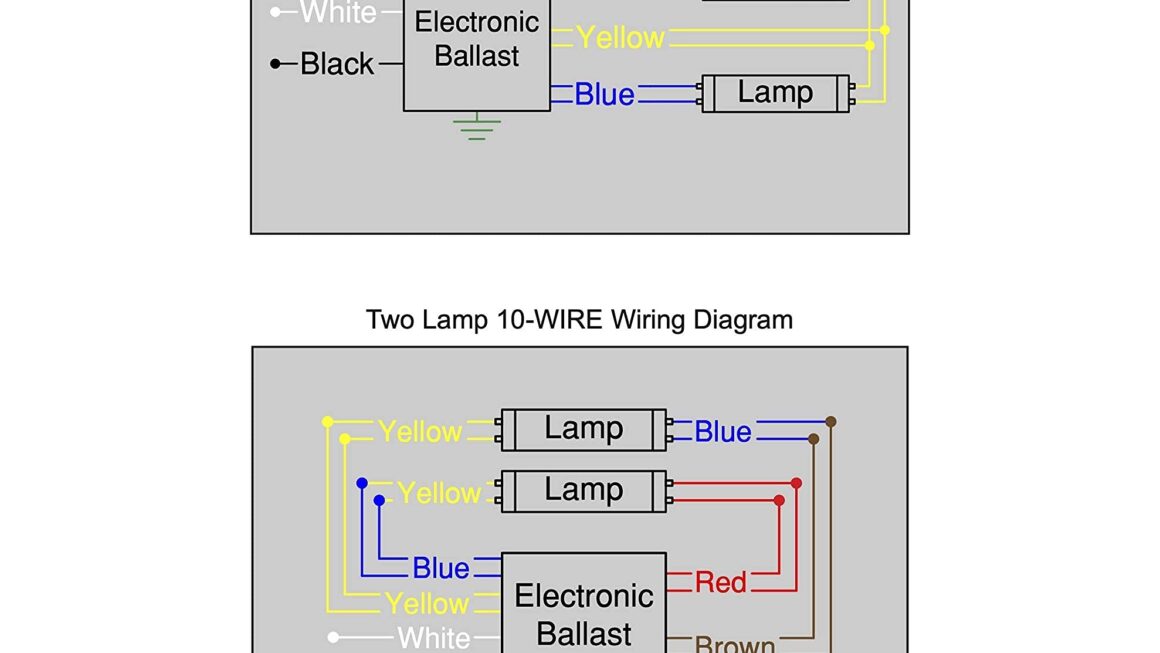
Next, carefully follow the wiring diagram that came with your lamp ballast. Typically, there will be labeled wires indicating where each wire should be connected. Take your time to ensure that each wire is securely connected to the correct terminal.
Once you’ve connected all the wires according to the diagram, it’s time to test your work. Turn the power back on and switch on the lamp. If everything is wired correctly, the lamp should light up without any issues. If not, double-check your connections and troubleshoot as needed.
Finally, once you’ve confirmed that the lamp is working properly, tidy up the wiring and secure any loose connections with electrical tape or wire nuts. Properly organizing the wiring will not only improve the aesthetics but also ensure the longevity of your lamp.
By following these simple steps and referring to the wiring diagram provided, you can successfully wire a lamp ballast on your own. Remember to always prioritize safety and consult a professional if you’re unsure about any step in the process.
Now that you have a better understanding of how to wire a lamp ballast, you can confidently tackle this project in your own home. With a little patience and attention to detail, you’ll have a beautifully lit space in no time!
Download and Print 2 Lamp Ballast Wiring Diagram Listed below