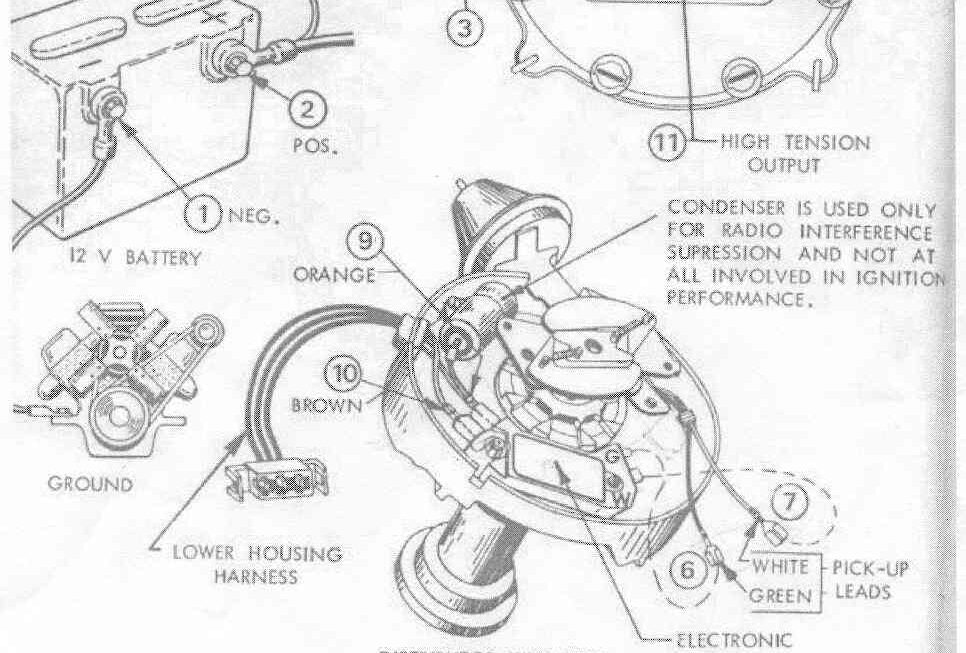
If you’re looking to upgrade your vehicle’s ignition system, understanding how to wire a 2 wire HEI distributor is crucial. This process can seem daunting at first, but with the right guidance, you’ll be able to tackle it with ease.
HEI, which stands for High Energy Ignition, is a popular choice among car enthusiasts for its improved performance and reliability. By following a wiring diagram specific to your distributor, you can ensure that your ignition system functions properly.

Related Post 2 Wire Well Pump Wiring Diagram
Start by locating the two wires on your HEI distributor: the 12V power wire and the tachometer signal wire. The 12V power wire should be connected to the ignition switch, while the tachometer signal wire goes to the tachometer or ECU, depending on your setup.
Refer to your specific wiring diagram to determine the correct placement of these wires. It’s essential to follow the diagram closely to avoid any mistakes that could lead to ignition issues down the road. Take your time and double-check your connections before reattaching the battery.
Once you’ve completed the wiring process, start your vehicle to ensure that everything is functioning correctly. Listen for any unusual sounds or vibrations, and check that your tachometer is reading accurately. If everything looks good, congratulations – you’ve successfully wired your 2 wire HEI distributor!
Remember, if you’re ever unsure about any step of the process, don’t hesitate to consult a professional or seek help from online forums and resources. With a bit of patience and attention to detail, you’ll be able to enjoy the benefits of your upgraded ignition system for years to come.
By following a 2 wire HEI distributor wiring diagram and taking the time to understand the process, you can confidently tackle this project and improve your vehicle’s performance. So grab your tools, get to work, and enjoy the results of your hard work on the road!
Download and Print 2 Wire Hei Distributor Wiring Diagram Listed below