Looking to add some LED lights to your home or workspace? You’ve come to the right place! LED lights are a great way to brighten up any room while saving energy and money.
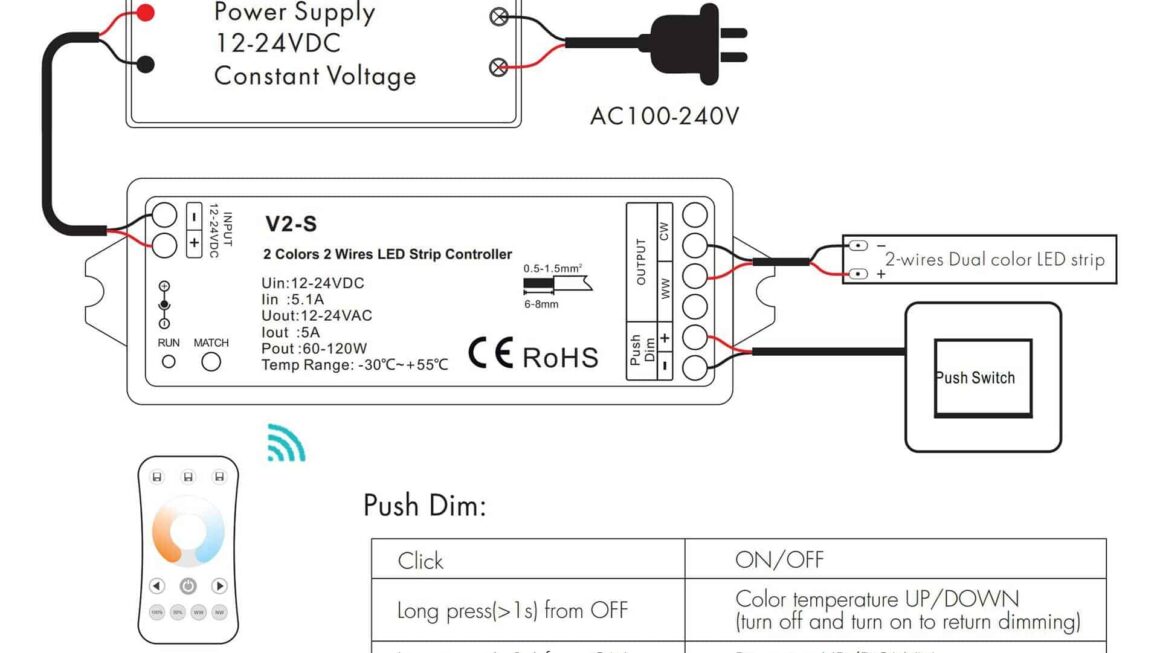
One popular option is the 2-wire LED light setup, which is easy to install and can be customized to fit your needs. In this article, we’ll provide you with a simple wiring diagram to help you get started.

Related Post Toyota Tacoma Stereo Wiring Diagram
1. Start by connecting one end of the wire to the positive terminal of the power source and the other end to the positive terminal of the LED light. Make sure to secure the connection with a wire connector to prevent any loose connections.
2. Next, connect one end of the second wire to the negative terminal of the power source and the other end to the negative terminal of the LED light. Again, use a wire connector to secure the connection.
3. Once both wires are securely connected, turn on the power source to test the lights. If everything is wired correctly, your LED lights should illuminate without any issues.
4. Finally, mount your LED lights in the desired location using screws or adhesive, and enjoy the bright and energy-efficient lighting they provide.
With this simple wiring diagram, you can easily install 2-wire LED lights in your home or office. Whether you’re looking to add some ambiance to a room or brighten up your workspace, LED lights are a great choice. So why wait? Get started on your LED lighting project today!
Download and Print 2-Wire Led Light Wiring Diagram Listed below