Looking to install a 2 wire temp sensor but not sure where to begin? Don’t worry, we’ve got you covered with an easy-to-follow wiring diagram that will have your sensor up and running in no time!
Whether you’re a seasoned DIY enthusiast or a complete newbie when it comes to electronics, this guide will walk you through the process step by step, making it a breeze to get your sensor connected and working properly.

Related Post Wiring Diagram Of Trailer Plug
2 Wire Temp Sensor Wiring Diagram
First things first, gather all the necessary tools and materials. You’ll need your 2 wire temp sensor, a power source, and some basic tools like wire cutters and strippers. Once you have everything ready, it’s time to get started!
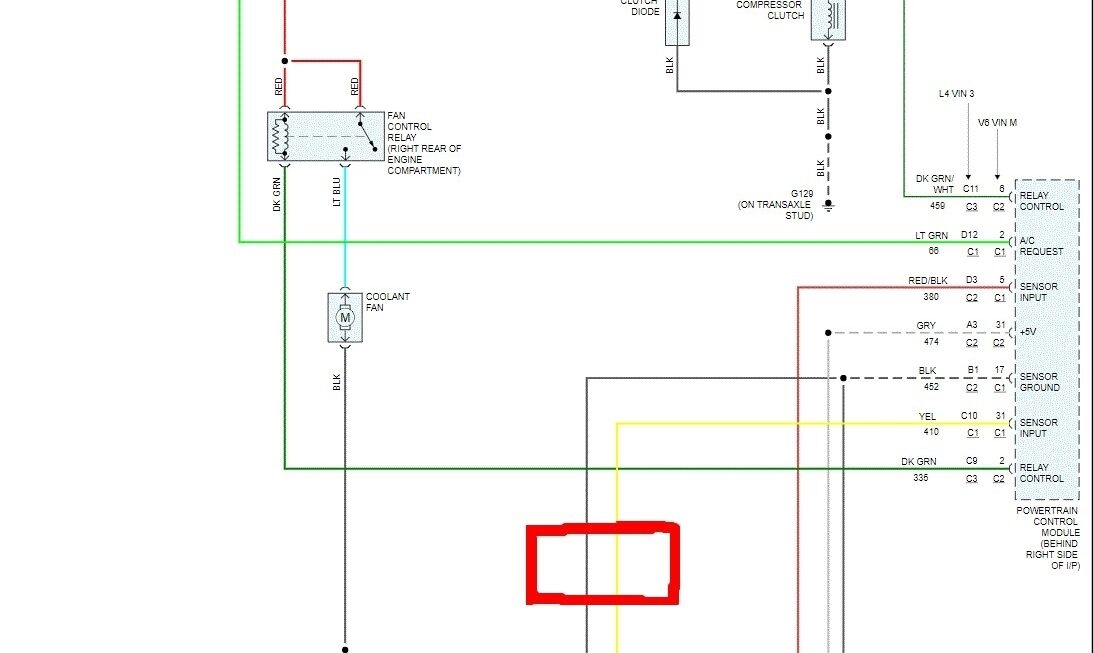
Start by identifying the two wires coming from your temp sensor. One wire will be for power (usually red) and the other will be for ground (typically black). Connect the power wire to the positive terminal of your power source and the ground wire to the negative terminal.
Next, double-check all your connections to ensure everything is secure and properly connected. Once you’ve confirmed that everything is in order, power up your sensor and test it out. If all goes well, you should see your sensor reading the temperature accurately.
And there you have it – your 2 wire temp sensor is now successfully wired and ready to use! With just a few simple steps, you can now monitor temperature with ease and precision, making it a valuable tool for a variety of applications.
So next time you need to install a 2 wire temp sensor, refer back to this handy wiring diagram to guide you through the process. It’s quick, easy, and hassle-free – just the way DIY projects should be!