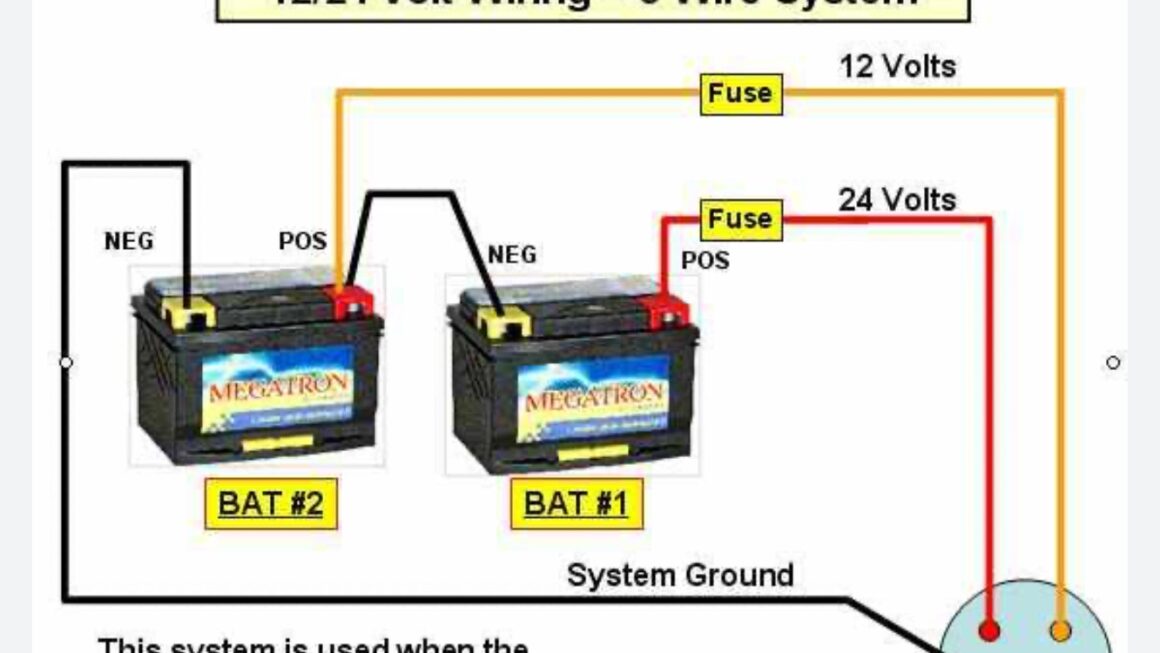
If you’re looking to set up a 24 volt system for your trolling motor, understanding the wiring diagram is crucial. With the right knowledge, you can easily connect the batteries and motor for optimal performance.
By following a 24 volt diagram for trolling motor wiring, you can ensure that your setup is efficient and effective. Whether you’re a seasoned angler or just starting out, having a solid understanding of the wiring is essential.

Related Post Wiring Diagram For Battery Isolator
Next, carefully study the 24 volt diagram for trolling motor wiring. Pay close attention to the placement of the batteries, the connections between them, and how the motor is integrated into the system. Understanding the diagram will help you execute the wiring accurately.
When connecting the batteries, be sure to follow the diagram precisely. Incorrect wiring can lead to inefficiencies or even damage to your trolling motor. Take your time and double-check your connections to ensure everything is set up correctly.
Once the wiring is complete, test the system to make sure everything is functioning as it should. Turn on the motor and observe its performance. If you encounter any issues, refer back to the diagram to troubleshoot and make any necessary adjustments.
In conclusion, setting up a 24 volt system for your trolling motor requires careful attention to detail and a solid understanding of the wiring diagram. By following the steps outlined in the diagram and ensuring proper connections, you can enjoy a smooth and efficient fishing experience on the water.
Download and Print 24 Volt Diagram Trolling Motor Wiring Listed below