If you’re looking to understand how to wire a 24 volt HVAC transformer, you’ve come to the right place. HVAC systems can be tricky to work with, but with the right guidance, you can tackle this project with confidence.
In this article, we’ll walk you through a detailed wiring diagram for a 24 volt HVAC transformer. By following these steps, you’ll be able to successfully wire your transformer and keep your HVAC system running smoothly.

Related Post Double Wide Mobile Home Electrical Wiring Diagram
Next, locate the existing transformer in your HVAC system. It’s typically found near the air handler or furnace. Once you’ve located the transformer, carefully remove the cover to expose the wiring. Take note of the existing wiring configuration to ensure proper installation of the new transformer.
Using your wire strippers, carefully strip the ends of the wires connected to the existing transformer. Then, connect the corresponding wires from the new 24 volt transformer to the existing wires. Make sure to secure the connections with electrical tape to prevent any loose connections.
Once the new transformer is securely connected, replace the cover and turn the power back on to your HVAC system. Test the system to ensure that the transformer is functioning properly. If everything is working as it should, you’ve successfully wired your 24 volt HVAC transformer!
In conclusion, wiring a 24 volt HVAC transformer may seem daunting at first, but with the right guidance, it can be a straightforward process. By following the steps outlined in this article, you’ll be able to confidently tackle this project and keep your HVAC system running efficiently. Remember to always prioritize safety when working with electrical components and consult a professional if you’re unsure about any step.
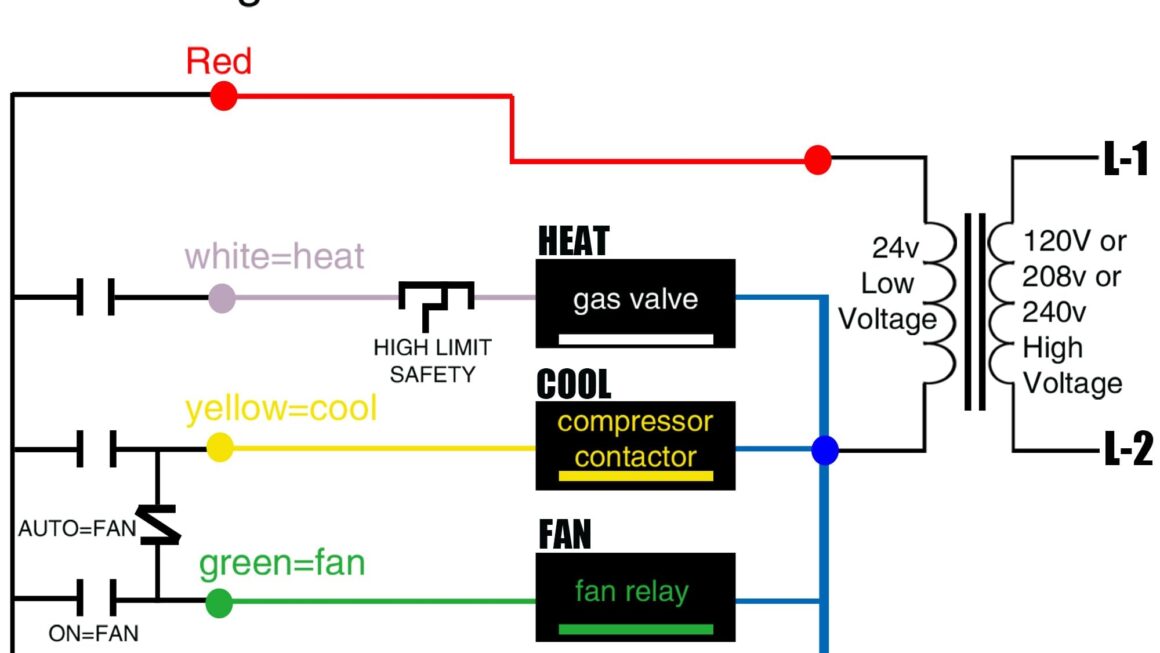
Download and Print 24 Volt Hvac Transformer Wiring Diagram Listed below