Looking to understand how to wire a 3 phase contactor? You’ve come to the right place! In this article, we’ll walk you through a simple 3 phase contactor wiring diagram that anyone can follow.
Whether you’re a DIY enthusiast or an electrician looking for a refresher, this guide will help you navigate the world of contactor wiring with ease. Let’s dive in and get started!

Related Post Electric Water Heater Wiring Diagram
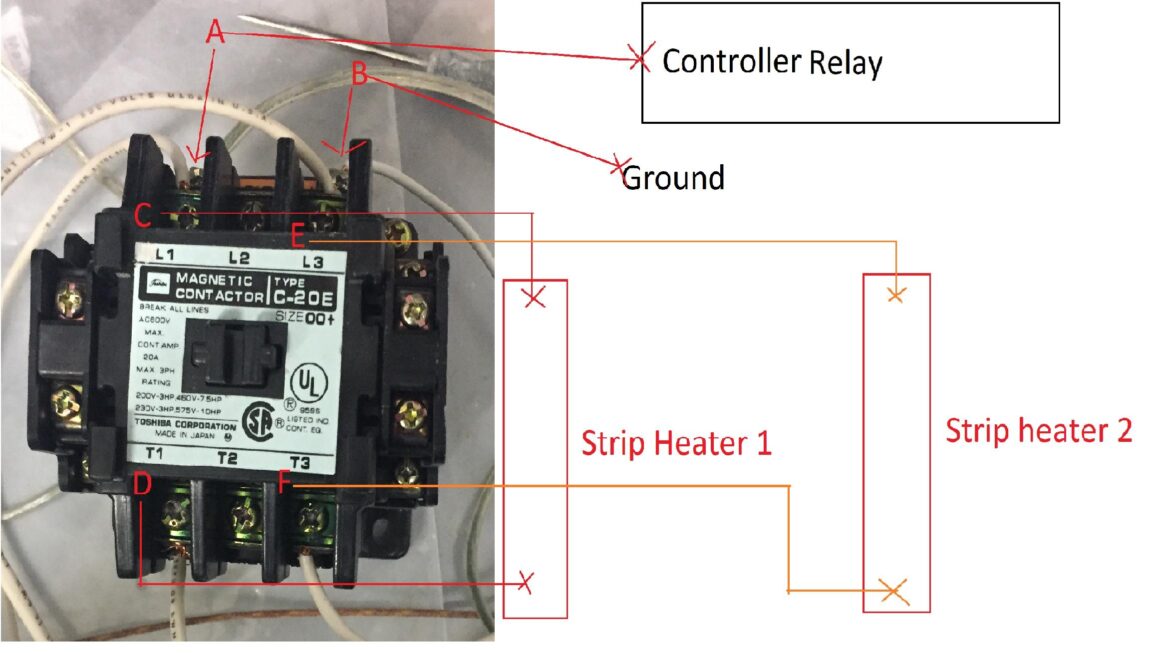
To wire a 3 phase contactor, you’ll need to connect the hot wires to the L1, L2, and L3 terminals on the contactor. The ground wire should be connected to the ground terminal. It’s important to follow the manufacturer’s instructions and consult a professional if you’re unsure.
Once you’ve connected the wires to the contactor, you’ll need to connect the other end of the wires to the appropriate terminals on your electrical panel. Make sure to turn off the power before starting any wiring work and double-check your connections before turning the power back on.
With the wiring complete, you can test the contactor to ensure it’s working properly. Turn on the power and check that the contactor engages when the circuit is activated. If everything looks good, congratulations – you’ve successfully wired a 3 phase contactor!
Remember, safety always comes first when working with electrical systems. If you’re not comfortable working with electricity or unsure about any part of the wiring process, don’t hesitate to seek help from a qualified electrician. It’s better to be safe than sorry!
Now that you have a better understanding of how to wire a 3 phase contactor, you can confidently tackle electrical projects with ease. With the right knowledge and precautions, you’ll be well on your way to mastering contactor wiring. Happy wiring!
Download and Print 3 Phase Contactor Wiring Diagram Listed below