If you’re looking to wire up a 3 prong 12V switch but don’t know where to start, you’ve come to the right place. Understanding the wiring diagram is key to ensuring your switch works correctly and safely.
Whether you’re working on a DIY project or need to replace a faulty switch, having a clear and concise wiring diagram is essential. In this article, we’ll break down the steps involved in wiring a 3 prong 12V switch, making it easy for you to follow along.

Related Post Leviton 3 Way Lighted Switch Wiring Diagram
Next, gather your materials, including a 12V power source, wires, a soldering iron, and electrical tape. Begin by connecting the power source to the common prong (“C”) and then decide whether you want the switch to be normally open or normally closed based on your needs.
If you choose normally open, connect the “NO” prong to your desired load or accessory. For normally closed, connect the “NC” prong instead. Be sure to secure all connections with solder and electrical tape to prevent any shorts or electrical hazards.
Once everything is connected, test your switch to ensure it functions as intended. If the switch operates correctly, you’re all set! If not, double-check your wiring and connections to troubleshoot any issues. With a little patience and attention to detail, you’ll have your 3 prong 12V switch up and running in no time.
In conclusion, wiring a 3 prong 12V switch doesn’t have to be complicated. By following a clear wiring diagram and taking the time to understand the function of each prong, you can successfully wire up your switch with ease. Remember to always prioritize safety and double-check your connections before powering up your switch. Happy wiring!
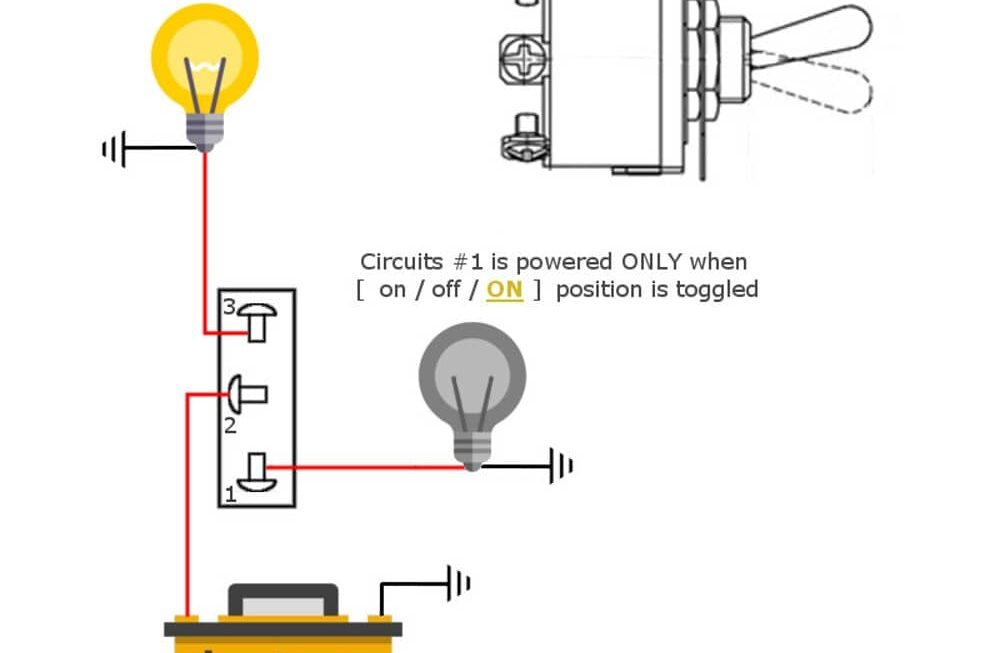
Download and Print 3 Prong 12V Switch Wiring Diagram Listed below