Are you looking for a simple guide to help you with your 3 prong headlight wiring? Look no further! We’ve got you covered with all the information you need to get the job done right.
Understanding how to properly wire your headlights is crucial for ensuring they work efficiently and safely. Whether you’re a beginner or an experienced DIY enthusiast, this article will walk you through the process step by step.

Related Post 7 Way Trailer Plug Wiring Diagram Ford
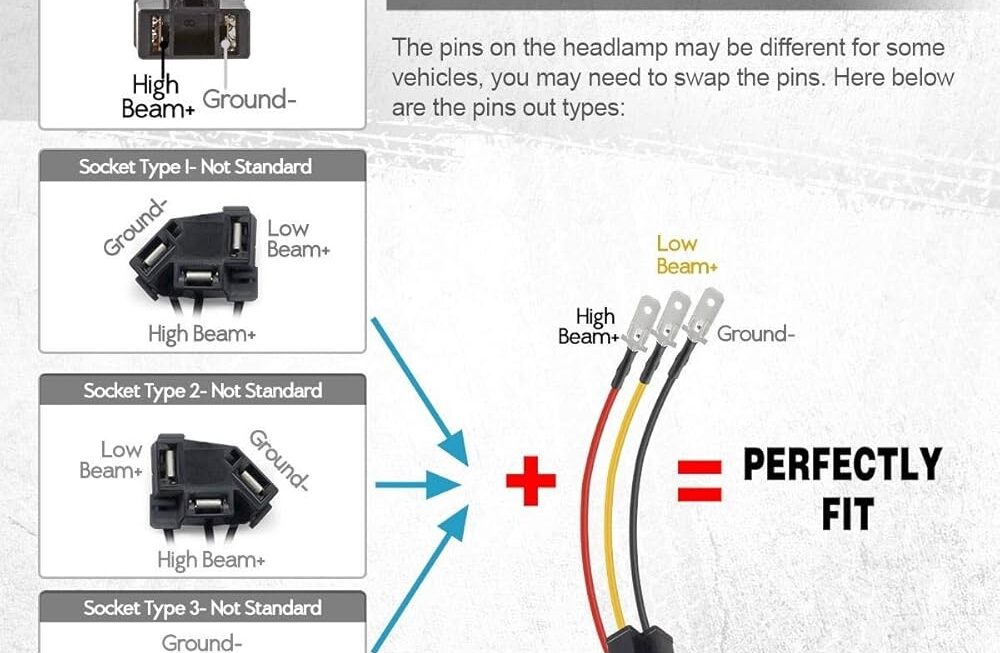
Begin by disconnecting the battery to avoid any electrical mishaps. Next, refer to the wiring diagram to identify which wires correspond to the high beam, low beam, and ground connections. It’s important to follow the diagram closely to avoid any confusion.
Once you’ve identified the correct wires, use your wire cutters to strip the insulation off the ends. Twist the corresponding wires together and secure them with electrical tape. Make sure the connections are tight to prevent any loose wiring that could lead to malfunctioning headlights.
After you’ve connected all the wires according to the diagram, it’s time to test your headlights. Reconnect the battery and turn on your headlights to ensure they are working properly. If everything is in order, you’re good to go!
Remember, safety should always be your top priority when working with electrical systems. If you’re unsure about any step in the wiring process, don’t hesitate to seek help from a professional. It’s better to be safe than sorry!
With this simple guide, you should now have a better understanding of how to wire your 3 prong headlights. By following these steps and paying attention to detail, you can ensure your headlights are functioning correctly and safely. Happy wiring!
Download and Print 3 Prong Headlight Wiring Diagram Listed below