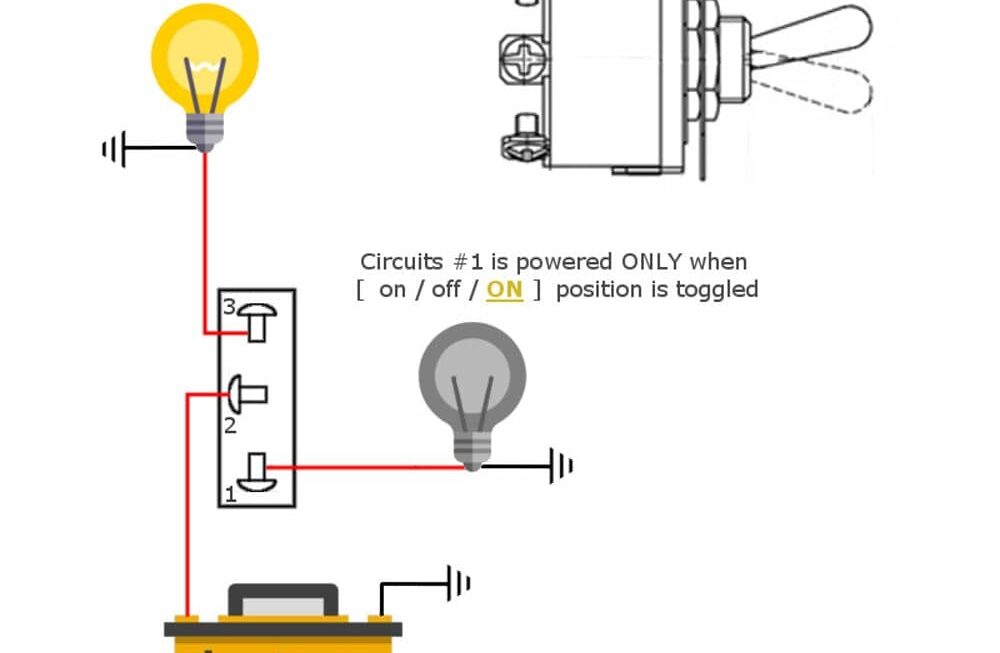
If you’re looking to wire a 3 prong switch, you’ve come to the right place. Understanding how to properly wire a switch is crucial for any DIY project or electrical work you may be doing.
Whether you’re a seasoned pro or a beginner, having a clear wiring diagram can make the process much easier. In this article, we’ll walk you through the steps of wiring a 3 prong switch in a simple and easy-to-understand way.

Related Post 3 Way Ceiling Fan Switch Wiring Diagram
First, identify the three terminals on your switch – the common terminal, the normally open terminal, and the normally closed terminal. Each terminal serves a specific purpose in the circuit, so it’s important to connect them correctly.
Next, connect the power source to the common terminal, the load to the normally open terminal, and the ground wire to the normally closed terminal. Make sure to double-check your connections before testing the switch to ensure everything is wired correctly.
Once you’ve wired the switch according to the diagram, test it to make sure it’s functioning properly. If the switch isn’t working as expected, double-check your connections and troubleshoot any issues that may arise.
By following a clear and concise wiring diagram, you can easily wire a 3 prong switch without any hassle. Remember to always prioritize safety when working with electrical components and consult a professional if you’re unsure about any step in the process.
Now that you have a better understanding of how to wire a 3 prong switch, you can confidently tackle any electrical project that comes your way. With the right tools and knowledge, you’ll be able to wire switches like a pro in no time!
Download and Print 3 Prong Switch Wiring Diagram Listed below