Are you looking to install or replace a 3-speed ceiling fan pull chain switch? Understanding how to wire it correctly is crucial for the fan to function properly. In this article, we will provide you with a wiring diagram that will help you navigate through the process.
Before we dive into the wiring diagram, it’s important to note that safety should always be your top priority when working with electrical components. Make sure to turn off the power at the breaker before starting the installation process to avoid any accidents.

Related Post 5 Plug Trailer Wiring Diagram
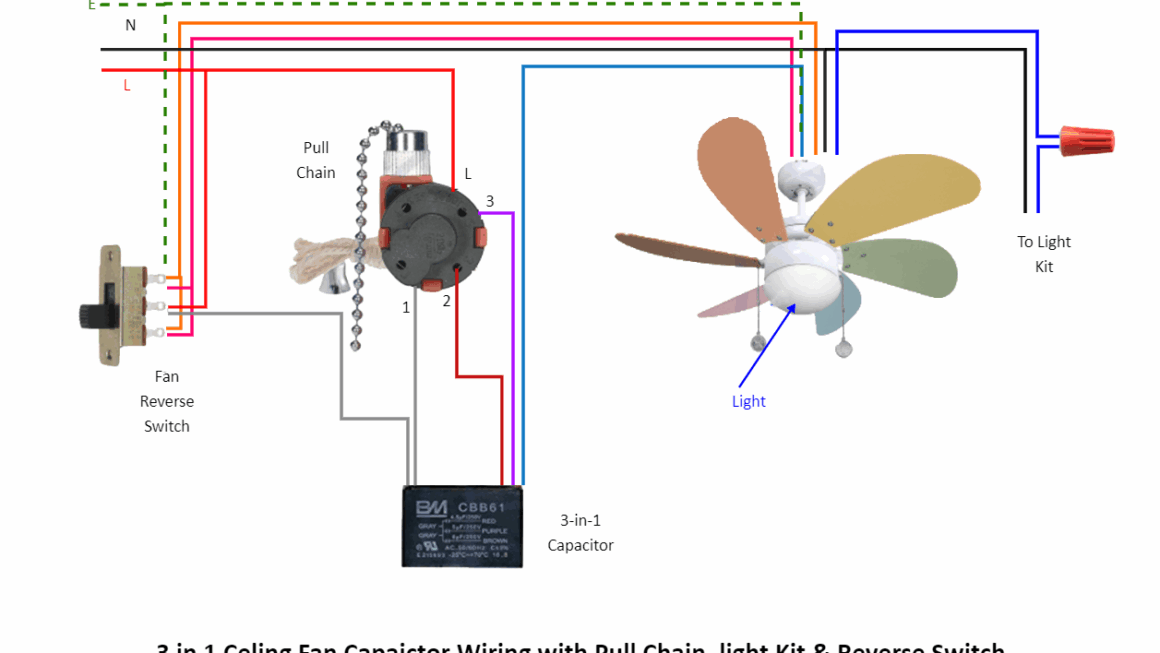
To wire the switch correctly, you will need to connect the hot wire (usually black) to the L terminal, and the fan wires to the corresponding terminals on the switch. Make sure to follow the manufacturer’s instructions for your specific fan model.
Once you have connected the wires to the switch, you can then secure the switch in place and test the fan to ensure that it is working correctly. If you encounter any issues, double-check your wiring connections and consult the wiring diagram for guidance.
Remember, if you are not comfortable working with electrical components or unsure about the wiring process, it’s always best to seek the help of a professional electrician to avoid any potential risks.
In conclusion, having a clear understanding of the wiring diagram for a 3-speed ceiling fan pull chain switch is essential for a successful installation. By following the steps outlined in this article and prioritizing safety, you can enjoy a properly functioning ceiling fan in no time.
Download and Print 3 Speed Ceiling Fan Pull Chain Switch Wiring Diagram Listed below