If you’re looking to install a 3-way dimmer switch in your home, you’ve come to the right place! In this guide, we’ll walk you through the process step by step, making it easy for you to do it yourself.
Before we get started, it’s important to have a clear understanding of how a 3-way dimmer switch works. Essentially, it allows you to control a light fixture from two different locations. This is great for rooms with multiple entry points, such as a hallway or staircase.

Related Post 7-Pin Trailer Plug Wiring Diagram With Brakes
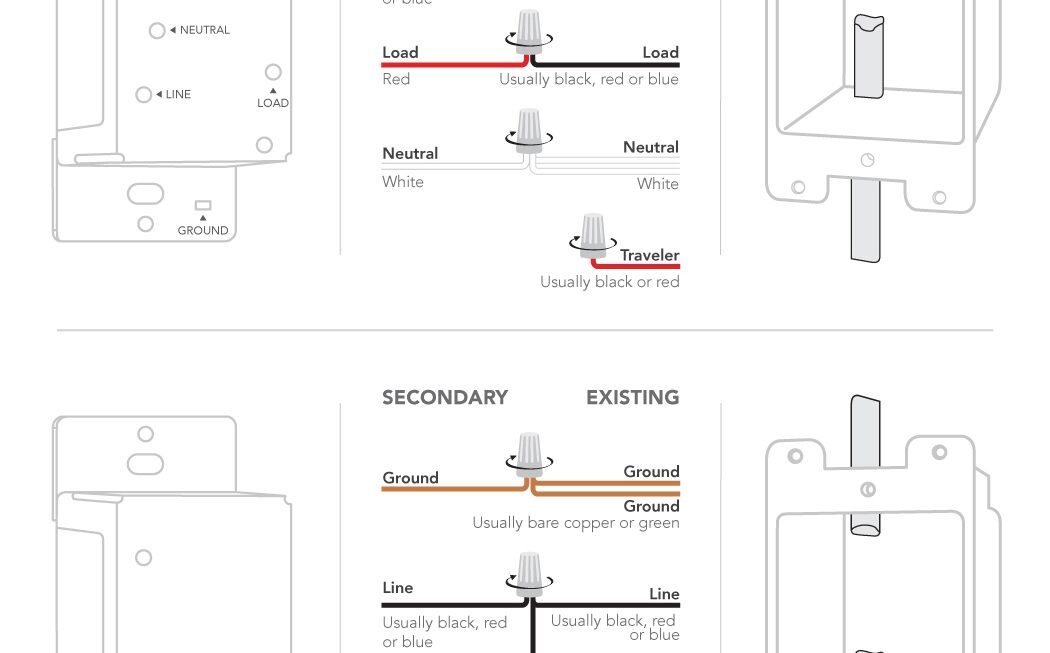
3-Way Dimmer Switch Wiring Diagram Pdf
First things first, gather all the necessary tools and materials for the job. You’ll need a screwdriver, wire stripper, voltage tester, and of course, the 3-way dimmer switch. Make sure to turn off the power to the circuit you’ll be working on before you begin.
Next, remove the existing switch from the wall. Take note of how the wires are connected to the switch, as you’ll need to replicate this when installing the dimmer switch. Use your voltage tester to double-check that the power is off before proceeding.
Now, it’s time to connect the wires to the new dimmer switch. Follow the wiring diagram provided with the switch to ensure you’re making the right connections. Once everything is securely in place, carefully tuck the wires back into the electrical box and attach the dimmer switch to the wall.
After everything is wired up, turn the power back on and test out your new 3-way dimmer switch. If everything is working properly, you’re good to go! Enjoy the convenience and energy savings that come with dimming your lights.
With this easy-to-follow guide, you’ll be able to install a 3-way dimmer switch in no time. Say goodbye to fumbling for the light switch in the dark and hello to customizable lighting options at your fingertips. Give it a try and see the difference it can make in your home!
Download and Print 3-Way Dimmer Switch Wiring Diagram Pdf Listed below