If you’ve ever tried to figure out how to wire a 3 way lamp switch, you know it can be a bit confusing. But fear not, we’re here to help simplify the process for you!
Whether you’re a beginner DIYer or just looking to save some money by doing it yourself, understanding the wiring diagram for a 3 way lamp switch is essential. Let’s break it down step by step.

Related Post Ford Ignition Switch Wiring Diagram
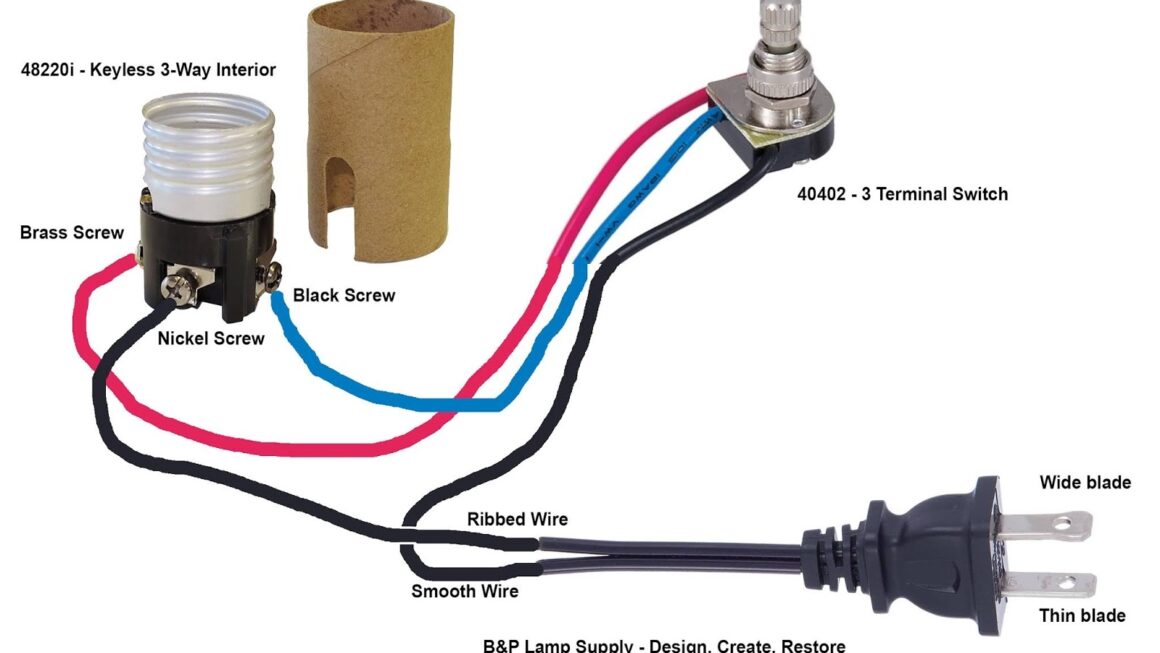
Next, identify the three terminals on the 3 way lamp switch: common (COM), traveler (T1), and traveler (T2). The common terminal will be connected to the hot wire, while the two traveler terminals will be connected to the two brass screws on the lamp socket.
Using your wire cutter/stripper, strip about 1/2 inch of insulation from the ends of the wires. Connect the hot wire to the common terminal, and the other two wires to the traveler terminals. Secure the connections with wire nuts and wrap them with electrical tape for added safety.
Once everything is connected, carefully tuck the wires back into the lamp base and reassemble the lamp. Turn the power back on and test out your new 3 way lamp switch. If everything is working properly, congratulations – you’ve successfully wired a 3 way lamp switch!
Remember, safety always comes first when working with electrical components. If you’re unsure about any step in the process, don’t hesitate to consult a professional electrician. Happy DIYing!
Download and Print 3 Way Lamp Switch Wiring Diagram Listed below