When it comes to setting up a bilge pump on your boat, having a clear wiring diagram can make the process much easier. In this article, we will walk you through the steps of wiring a 3 wire bilge pump, ensuring that your system is set up correctly and ready to keep your boat safe and dry.
One of the most important things to remember when working with electrical systems on your boat is safety. Always make sure to disconnect the power source before beginning any work, and double-check your connections to avoid any potential hazards.

Related Post A C Unit Wiring Diagram
Next, you will need to connect the positive wire to the positive terminal on the pump, the negative wire to the negative terminal, and the ground wire to the ground terminal. It is important to secure these connections properly to ensure a reliable and safe electrical connection.
Once you have connected all the wires, it is a good idea to test the pump to make sure it is working correctly. You can do this by turning on the power source and listening for the sound of the pump running. If everything is set up correctly, you should hear the pump kicking in and the water being pumped out.
After testing the pump, make sure to secure the wires and terminals to prevent any movement or damage while the boat is in use. It is also a good idea to label the wires and terminals for future reference, in case you need to troubleshoot or replace any components in the future.
In conclusion, wiring a 3 wire bilge pump is a straightforward process that can be easily accomplished with the right tools and knowledge. By following the steps outlined in this article, you can ensure that your bilge pump is set up correctly and ready to keep your boat safe and dry on the water.
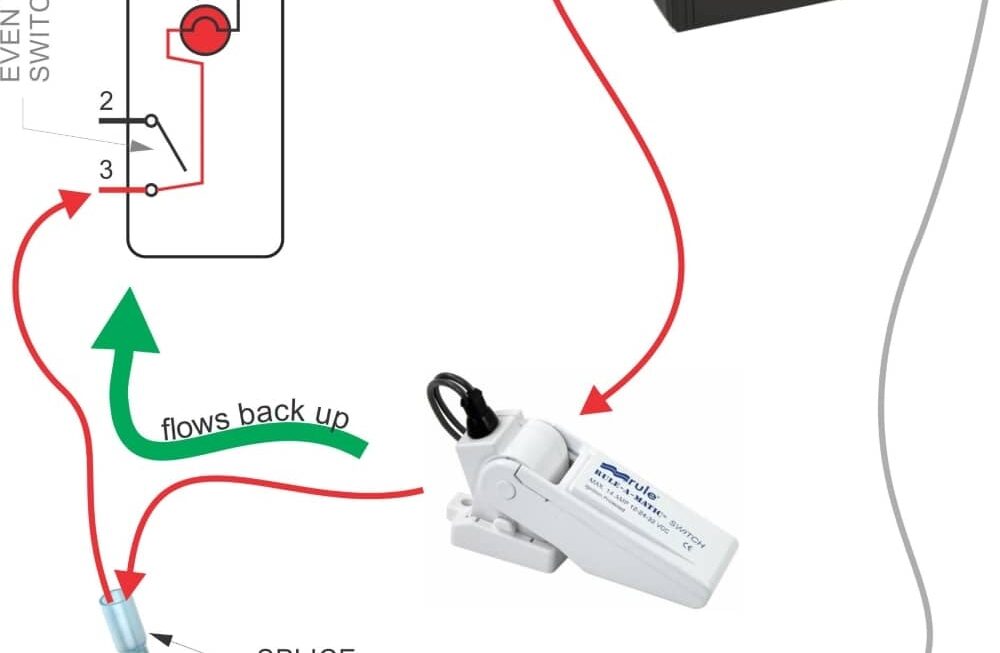
Download and Print 3 Wire Bilge Pump Wiring Diagram Listed below