Have you ever wondered how to wire up a 3 wire headlight on your car or motorcycle? It may seem complicated at first, but with the right diagram and instructions, it can be a simple and straightforward process.
Whether you’re replacing a broken headlight or upgrading to a new set, knowing how to wire them correctly is essential for safety and functionality. In this article, we’ll walk you through a 3 wire headlight wiring diagram to help you get the job done right.

Related Post Wiring Diagram For Well Pump
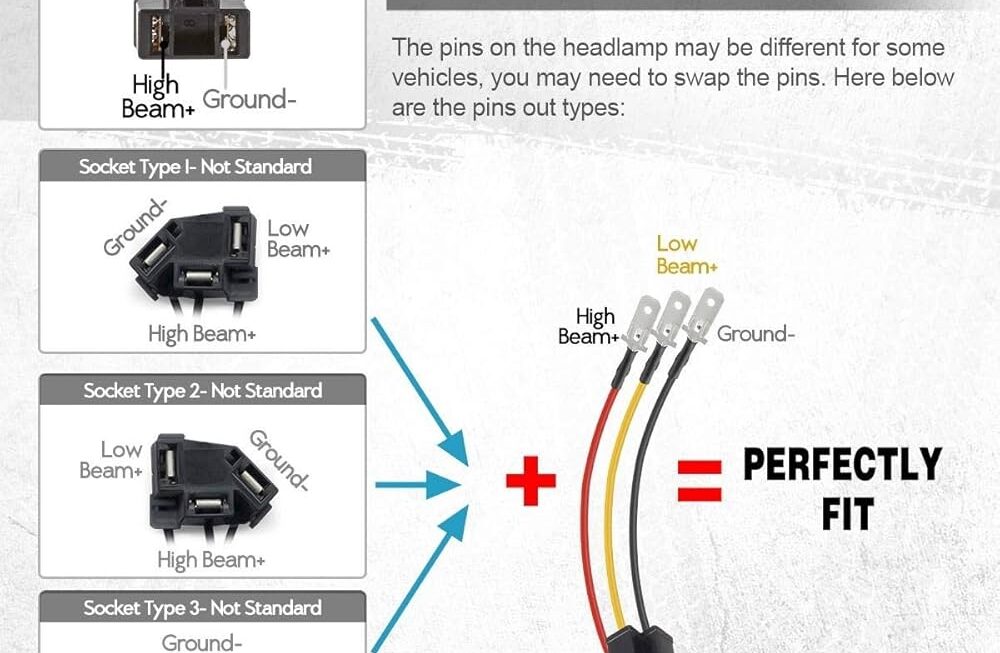
First, identify the three wires coming from your headlight assembly: the ground wire, low beam wire, and high beam wire. Refer to your wiring diagram to determine which color corresponds to each function. It’s crucial to connect each wire to the correct terminal to avoid any issues.
Once you’ve identified the wires and their corresponding functions, carefully strip the insulation off the ends of each wire. Twist the exposed copper strands together and secure them with electrical tape or solder, depending on your preference and skill level. Make sure the connections are secure and insulated to prevent any electrical shorts.
After you’ve connected the wires according to the wiring diagram, test the headlight to ensure that both the low and high beams are working correctly. If everything is functioning as it should, secure any loose wires and tidy up the installation to prevent any potential hazards or damage.
With your 3 wire headlight successfully wired and tested, you can now enjoy improved visibility and safety on the road. Remember to refer to your vehicle’s manual or seek professional help if you’re unsure about any step in the process. Safe driving!
Download and Print 3 Wire Headlight Wiring Diagram Listed below