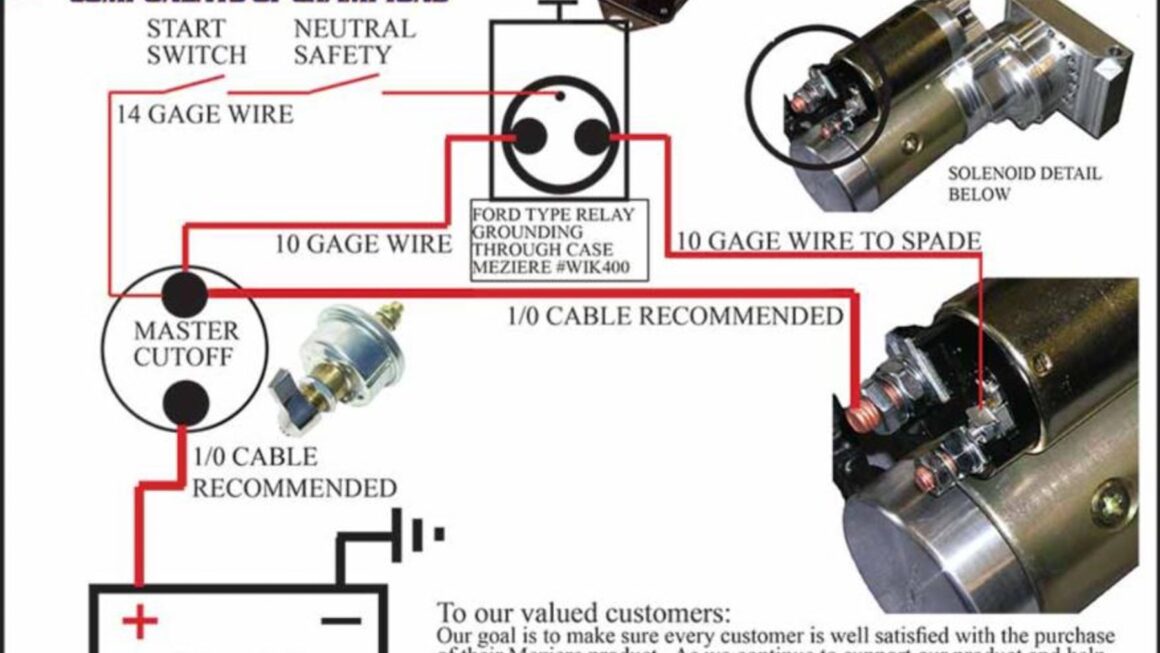
When it comes to wiring diagrams for 3 wire starters, it’s important to have a clear understanding of how everything connects. Whether you’re a seasoned electrician or a DIY enthusiast, having the right diagram can make the job much easier.
Understanding the layout and connections of a 3 wire starter can help prevent any potential mishaps or confusion during the installation process. With the right diagram in hand, you can confidently tackle the task at hand and ensure everything is wired correctly.

Related Post Alpine Ilx-W650 Wiring Diagram
The power wire is responsible for supplying the necessary electrical current to the starter, while the control wire is used to activate the starter when needed. The ground wire, on the other hand, helps to complete the circuit and ensure proper functioning of the starter.
When referring to a wiring diagram for a 3 wire starter, you’ll typically see each wire clearly labeled and indicated with specific symbols. This visual representation can help you understand how each wire should be connected and make the installation process much smoother.
By following a detailed wiring diagram for a 3 wire starter, you can avoid any potential mistakes and ensure that your starter operates efficiently and safely. Whether you’re replacing an old starter or installing a new one, having a reliable diagram on hand is key to a successful installation.
In conclusion, having a clear and concise wiring diagram for a 3 wire starter is essential for any electrical project. By understanding the connections and functions of each wire, you can confidently tackle the installation process and ensure everything is wired correctly. So, next time you’re working on a starter project, be sure to reference a reliable diagram to guide you through the process.
Download and Print 3 Wire Starter Wiring Diagram Listed below