Planning to wire up your RV for 30 amp service? You’ve come to the right place! In this article, we’ll walk you through a simple 30 Amp RV wiring diagram to help you get your RV powered up and ready to hit the road.
Whether you’re a seasoned RVer or new to the world of RVing, understanding how to properly wire your RV for 30 amp service is essential. With the right diagram and a few basic tools, you can easily tackle this project and ensure your RV has the power it needs to keep you comfortable on your travels.

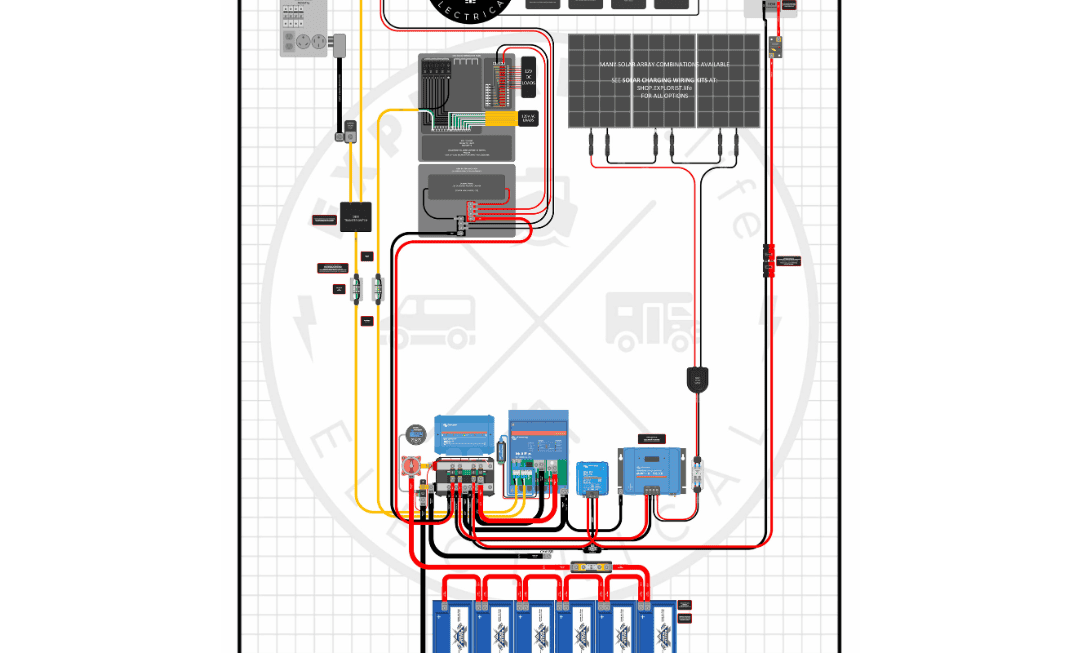
Related Post Three Phase Electric Motor Wiring Diagram
Start by turning off the power to your RV at the main breaker panel. Next, connect the black wire to the brass terminal on the 30 amp RV receptacle and the white wire to the silver terminal. Then, connect the green wire to the green terminal. Make sure to secure all connections with wire nuts and electrical tape.
Once you’ve connected all the wires, carefully insert the receptacle into the electrical box and secure it in place. Finally, attach the 30 amp RV plug to the other end of the electrical cable, making sure to match the wires to the correct terminals. Once everything is securely connected, you can turn the power back on and test your new 30 amp RV wiring.
With your RV now wired for 30 amp service, you can rest easy knowing that you’ll have all the power you need for your next adventure. Whether you’re camping in a remote location or enjoying the comforts of a full-service RV park, having a properly wired RV is key to a successful trip.
So there you have it – a simple and easy-to-follow 30 Amp RV wiring diagram to help you get your RV powered up and ready to go. With just a little bit of time and effort, you can ensure that your RV is equipped with the power it needs to keep you comfortable on all your travels.
Download and Print 30 Amp Rv Wiring Diagram Listed below