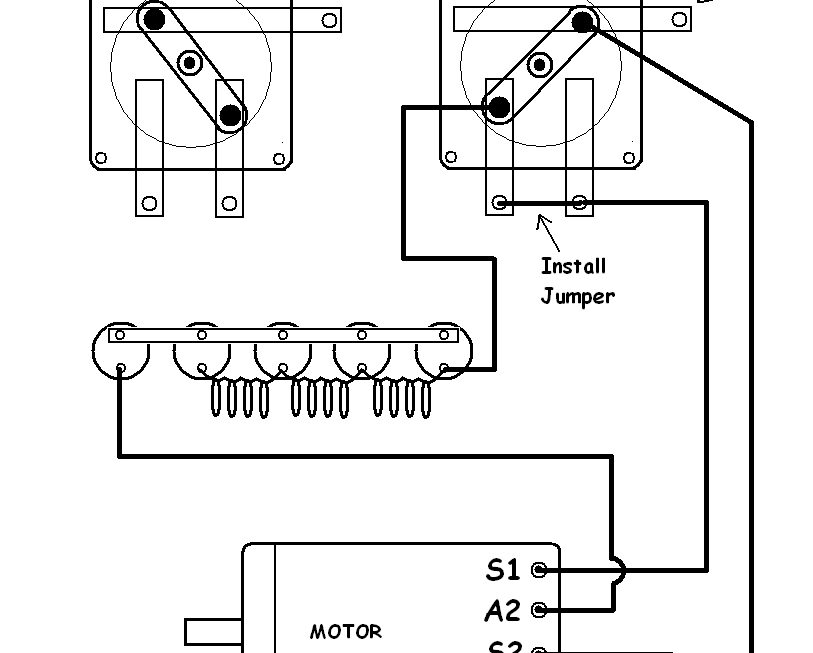
If you’re looking to upgrade or repair your 36 volt golf cart, having a wiring diagram is essential for getting the job done right. With the right diagram, you can easily troubleshoot any electrical issues and make sure everything is connected properly.
Whether you’re a seasoned golf cart enthusiast or a beginner looking to learn more about how your cart works, having a wiring diagram on hand can save you time and frustration. Understanding how the electrical components are connected can help you make informed decisions about upgrades and repairs.

Related Post 3 And 4 Way Switch Wiring Diagram Pdf
By following the wiring diagram, you can ensure that your golf cart operates safely and efficiently. Proper wiring is crucial for maintaining the performance and longevity of your cart’s electrical system. With a clear diagram in hand, you can tackle any wiring project with ease.
Whether you’re installing new accessories, upgrading to a higher voltage system, or troubleshooting an electrical issue, having a wiring diagram is a valuable resource. It can help you understand the layout of your cart’s electrical system and make informed decisions about modifications and repairs.
Don’t let electrical issues derail your golf cart adventures. With a comprehensive wiring diagram, you can confidently tackle any wiring project and keep your cart running smoothly. Stay informed and empowered with the knowledge that a wiring diagram provides.
With a 36 volt golf cart wiring diagram at your fingertips, you can take charge of your electrical system and keep your cart in top condition. Whether you’re a DIY enthusiast or rely on a professional for repairs, having a clear diagram is essential for maintaining your cart’s performance and reliability.
Download and Print 36 Volt Golf Cart Wiring Diagram Listed below