If you’re looking for a reliable and efficient way to wire your 36V Club Car, you’ve come to the right place! Having a clear wiring diagram is essential to ensure your golf cart runs smoothly and safely.
With the 36V Club Car Wiring Diagram 36 Volt, you can easily follow the step-by-step instructions to set up your electrical system with confidence. No more guesswork or confusion – just clear guidance to get the job done right!

Related Post Wiring Diagram For A Camper Trailer
Next, carefully study the wiring diagram to understand the layout and connections. It’s important to follow the diagram precisely to avoid any mistakes that could lead to electrical issues down the line. Take your time and double-check each connection before moving on to the next step.
As you start connecting the wires according to the diagram, be sure to secure them properly to prevent any loose connections or potential hazards. Use electrical tape or wire connectors to ensure a tight and secure fit. It’s better to take your time and do it right the first time than to rush through and risk damaging your Club Car.
Once all the connections are made and secure, it’s time to test the electrical system to ensure everything is working correctly. Reconnect the battery and turn on the power to see if all the components are functioning as they should. If you encounter any issues, refer back to the wiring diagram to troubleshoot and make any necessary adjustments.
With the 36V Club Car Wiring Diagram 36 Volt as your guide, you can rest assured that your golf cart’s electrical system is set up properly and ready to hit the green. Enjoy a smooth and trouble-free ride knowing that you’ve wired your Club Car with precision and care.
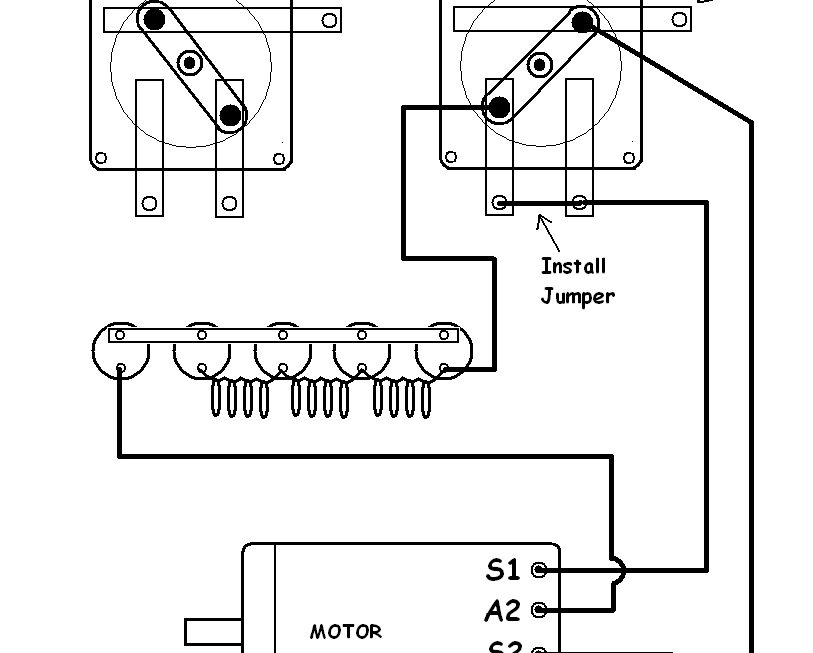
Download and Print 36V Club Car Wiring Diagram 36 Volt Listed below