If you’re looking to wire up a 4 pin rocker switch, you’ve come to the right place! Rocker switches are commonly used in a variety of electrical applications, from cars to boats to home appliances.
By following a simple wiring diagram, you can easily install a 4 pin rocker switch in no time. Whether you’re a DIY enthusiast or a professional electrician, this guide will help you get the job done quickly and efficiently.

Related Post Trolling Motor 24 Volt Wiring Diagram
Next, connect the power source to the first pin on the rocker switch. This will ensure that the switch can control the flow of electricity to your desired device or appliance. Make sure to secure the connections properly to prevent any electrical issues.
After connecting the power source, wire the second pin on the rocker switch to the device you want to control. This could be a light, a fan, or any other electrical component. By properly connecting the wires, you can easily turn the device on and off with the rocker switch.
Finally, connect the remaining two pins on the rocker switch to the ground. This will complete the circuit and ensure that the switch functions correctly. Once all the connections are secure, you can test the rocker switch to make sure it’s working properly.
In conclusion, wiring a 4 pin rocker switch is a simple and straightforward process that can be done by anyone with basic electrical knowledge. By following the wiring diagram and making secure connections, you can easily install a rocker switch in your next electrical project.
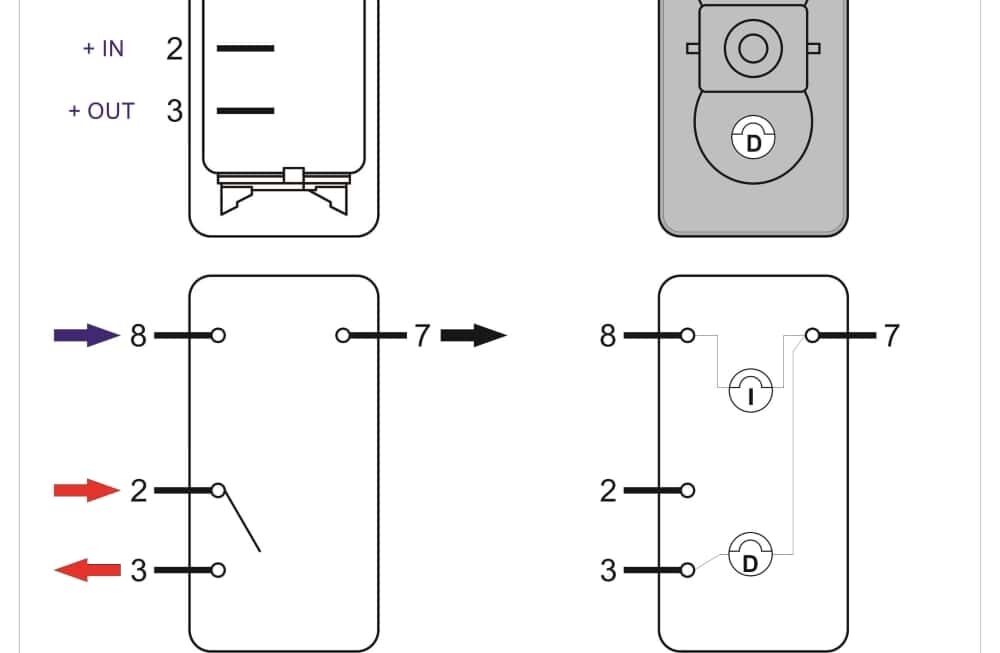
Download and Print 4 Pin Rocker Switch Wiring Diagram Listed below