Are you looking for a simple and easy-to-follow guide on how to wire a 4 pole starter solenoid? You’ve come to the right place! In this article, we will walk you through the steps to wire your 4 pole starter solenoid like a pro.
Whether you’re a beginner or a seasoned DIYer, understanding the wiring diagram of a 4 pole starter solenoid is essential for the proper functioning of your vehicle. By following our guide, you can ensure that your starter solenoid works efficiently and effectively.

Related Post 4 Terminal Capacitor Wiring Diagram
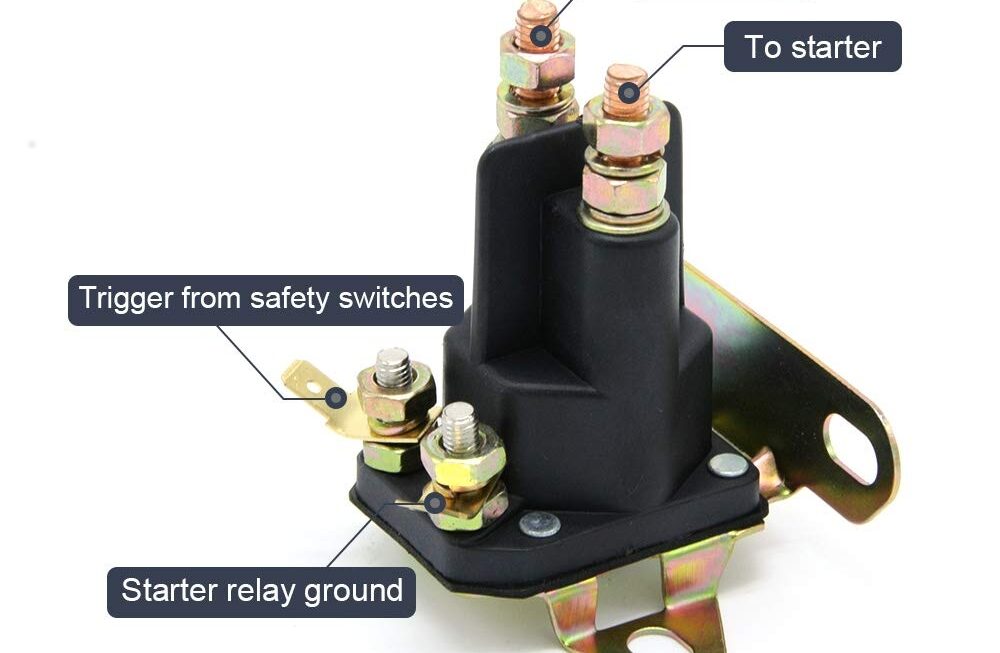
Next, carefully study the wiring diagram that comes with your starter solenoid. Identify the four poles and their corresponding terminals. It’s crucial to connect the wires to the correct terminals to avoid any electrical mishaps or damage to your vehicle.
Now, it’s time to start wiring! Begin by connecting the positive terminal of your battery to the “S” terminal on the solenoid. Then, connect the “I” terminal to the ignition switch, the “M” terminal to the starter motor, and the “C” terminal to the chassis ground.
Once all the wires are securely connected, double-check your connections and make sure everything is properly insulated with electrical tape. Test the starter solenoid to ensure that it engages and disengages smoothly without any issues.
In conclusion, wiring a 4 pole starter solenoid is a straightforward process that can be easily done with the right tools and knowledge. By following our step-by-step guide, you can confidently wire your starter solenoid and get your vehicle up and running in no time!
Download and Print 4 Pole Starter Solenoid Wiring Diagram Listed below