Looking to install a solenoid winch but not sure how to wire it up? You’ve come to the right place! In this article, we’ll walk you through a simple and easy-to-understand 4 solenoid winch wiring diagram.
Whether you’re a seasoned DIYer or just starting out, understanding the wiring diagram is crucial to ensure your winch operates safely and effectively. Don’t worry, we’ll break it down step by step so you can get your winch up and running in no time!

Related Post Lenco Trim Tabs Wiring Diagram
Next, you’ll need to identify the positive and negative terminals on your winch motor and battery. This is crucial to ensure proper connectivity and prevent any short circuits. Once you’ve identified the terminals, you can start connecting the wires according to the wiring diagram.
Make sure to follow the color-coding on the diagram to avoid any confusion. Connect the wires from the winch controller to the corresponding terminals on the solenoids and winch motor. Double-check all connections to ensure everything is secure before testing your winch.
Once you’ve completed the wiring process, it’s time to test your winch. Press the controller button to engage the winch motor and see if it operates smoothly. If everything is working as it should, congratulations! You’ve successfully wired up your 4 solenoid winch.
In conclusion, understanding and following a 4 solenoid winch wiring diagram is essential for a successful installation. By taking the time to properly connect all components, you can ensure your winch operates safely and efficiently. Now, go ahead and put your new wiring skills to the test!
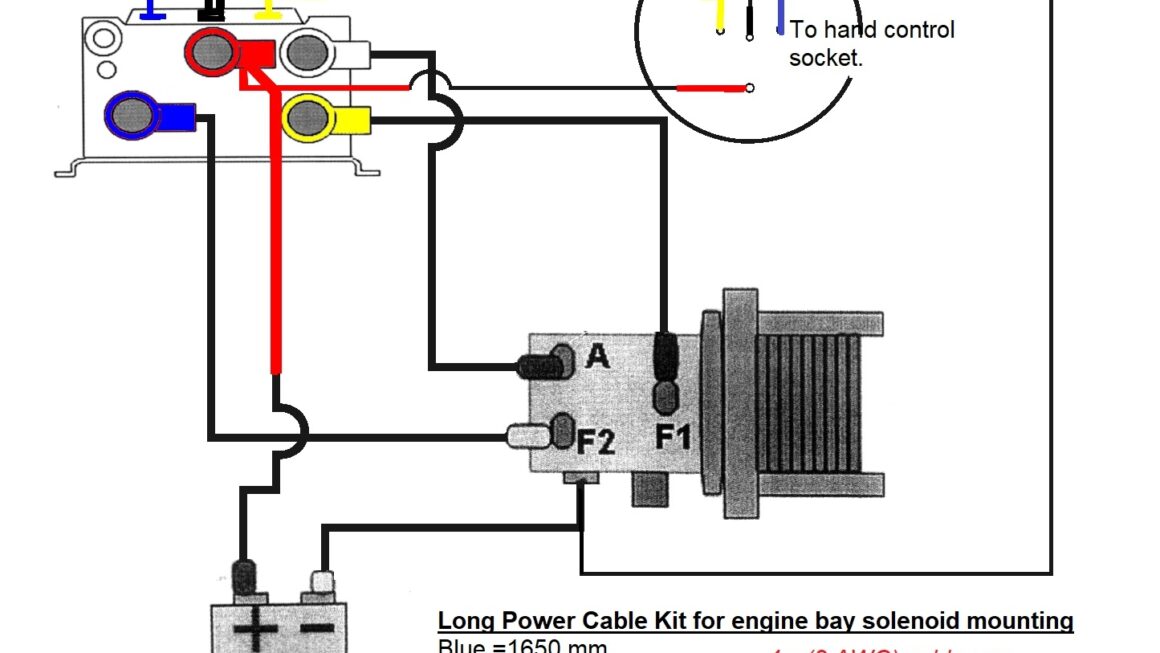
Download and Print 4 Solenoid Winch Wiring Diagram Listed below