If you’re looking to understand how to wire a terminal capacitor, you’ve come to the right place. Whether you’re a DIY enthusiast or a professional electrician, knowing how to properly wire a terminal capacitor is essential for various electronic projects.
A terminal capacitor is a vital component in many electrical circuits, helping to store and release electrical energy as needed. By learning how to wire a terminal capacitor correctly, you can ensure the smooth operation of your electronic devices and projects.

Related Post 4 Post Solenoid Wiring Diagram
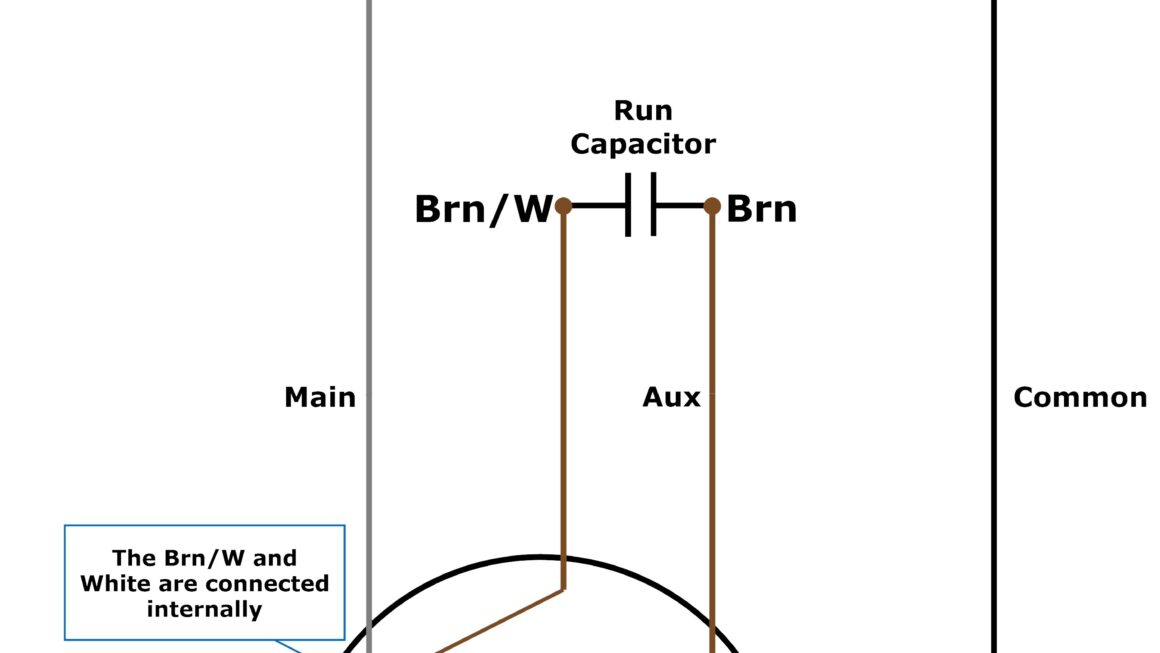
1. Start by identifying the terminals on your capacitor. There are usually four terminals labeled as C, H, F, and P. Each terminal serves a specific function in the circuit and must be connected correctly.
2. Connect the C terminal of the capacitor to the common terminal of the power source. This is usually the neutral or ground terminal, depending on the circuit requirements.
3. Connect the H terminal of the capacitor to the start terminal of the motor or device you are powering. This terminal helps in the initial start-up of the motor.
4. Connect the F terminal of the capacitor to the run terminal of the motor or device. This terminal helps in the continuous operation of the motor once it has started.
5. Finally, connect the P terminal of the capacitor to the power supply’s hot or live terminal. This terminal provides the necessary power for the capacitor to function correctly.
By following this simple 4 terminal capacitor wiring diagram, you can ensure that your capacitor is wired correctly and ready to be used in your electronic projects. Remember to double-check your connections and always follow safety precautions when working with electrical components.
Download and Print 4 Terminal Capacitor Wiring Diagram Listed below