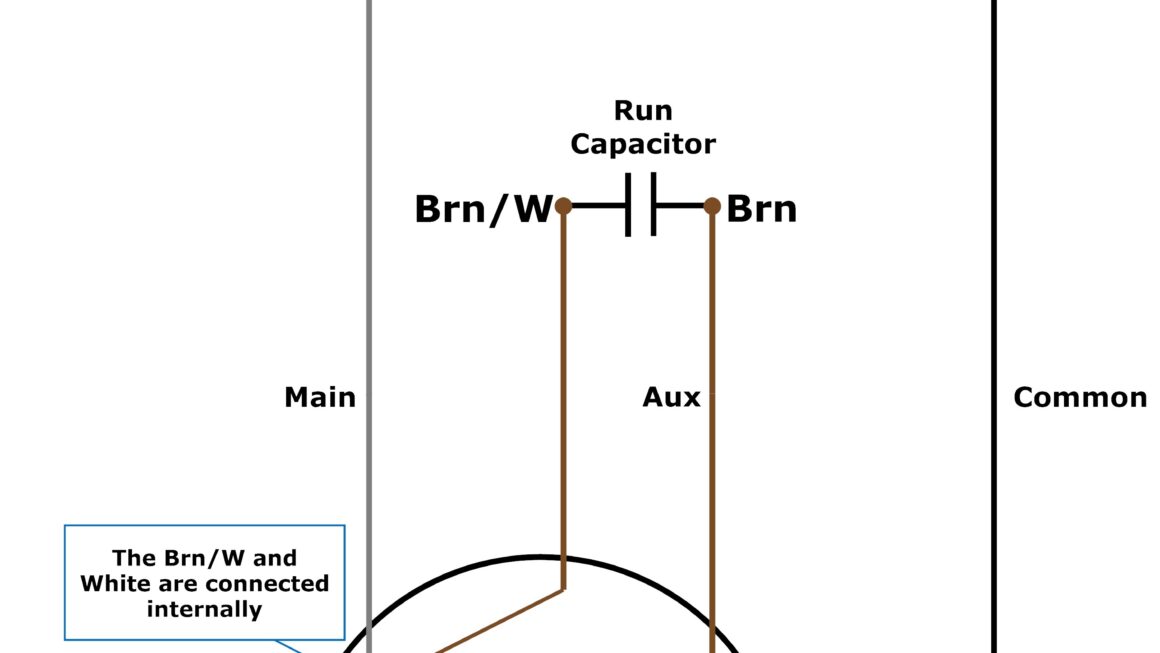
If you’re looking to replace or repair the wiring on your 4 wire condenser fan motor, you’ve come to the right place! Understanding the wiring diagram is essential for getting the job done correctly.
Whether you’re a seasoned DIY enthusiast or just starting out, this guide will walk you through the process step by step. With a little patience and the right tools, you’ll have your condenser fan motor up and running in no time.

Related Post Blower Motor Wiring Diagram Manual
Identify the wires coming from the motor and match them to the corresponding terminals on the new motor. It’s crucial to connect the wires correctly to ensure the motor functions properly and doesn’t get damaged.
If you’re unsure about any part of the wiring diagram, don’t hesitate to consult the manufacturer’s instructions or seek help from a professional. It’s better to be safe than sorry when it comes to electrical work.
Once you’ve connected all the wires according to the diagram, double-check your work to make sure everything is secure. Turn the power back on and test the motor to see if it’s running smoothly. Congratulations, you’ve successfully wired your 4 wire condenser fan motor!
In conclusion, understanding the wiring diagram for your 4 wire condenser fan motor is crucial for a successful installation. By following the steps outlined in this guide, you can tackle this project with confidence and get your motor up and running in no time. Happy wiring!
Download and Print 4 Wire Condenser Fan Motor Wiring Diagram Listed below