Have you ever needed to wire up a 4 wire LCT but weren’t sure where to start? Don’t worry, we’ve got you covered with this easy-to-follow guide!
Whether you’re a seasoned electrician or just a DIY enthusiast, understanding the wiring diagram for a 4 wire LCT can be a daunting task. But fear not, we’re here to break it down for you in simple terms.

Related Post John Deere Z425 Ignition Wiring Diagram
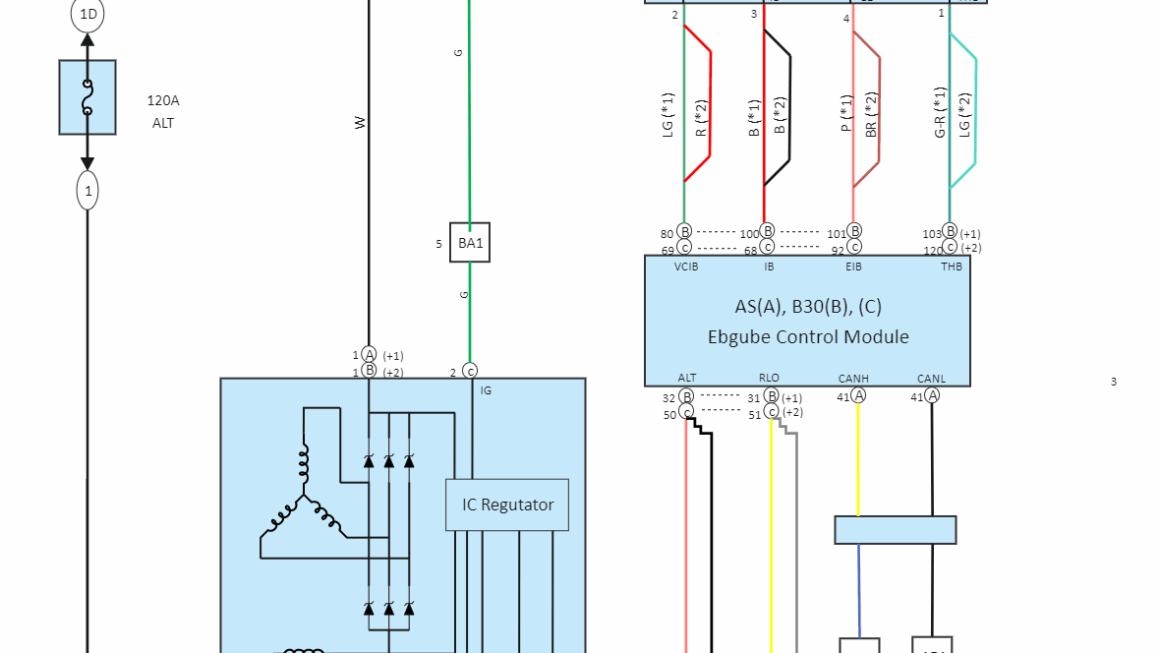
Next, you’ll need to consult the wiring diagram that came with your LCT. This diagram will show you exactly how to connect each wire to the appropriate terminals. It’s important to follow this diagram carefully to ensure proper functionality and safety.
When connecting the wires, make sure to use the correct tools and techniques. This includes stripping the wires, twisting them together securely, and using wire nuts to make a strong connection. Remember, safety always comes first when working with electrical components.
Once you’ve successfully wired up your 4 wire LCT according to the diagram, it’s time to test it out. Turn on the power and see if everything is working as it should. If you encounter any issues, double-check your connections and consult the wiring diagram again.
In conclusion, wiring a 4 wire LCT doesn’t have to be a complicated task. By following the wiring diagram provided and taking the necessary precautions, you can ensure a successful installation. So go ahead, tackle that wiring project with confidence!
Download and Print 4 Wire Lct Wiring Diagram Listed below