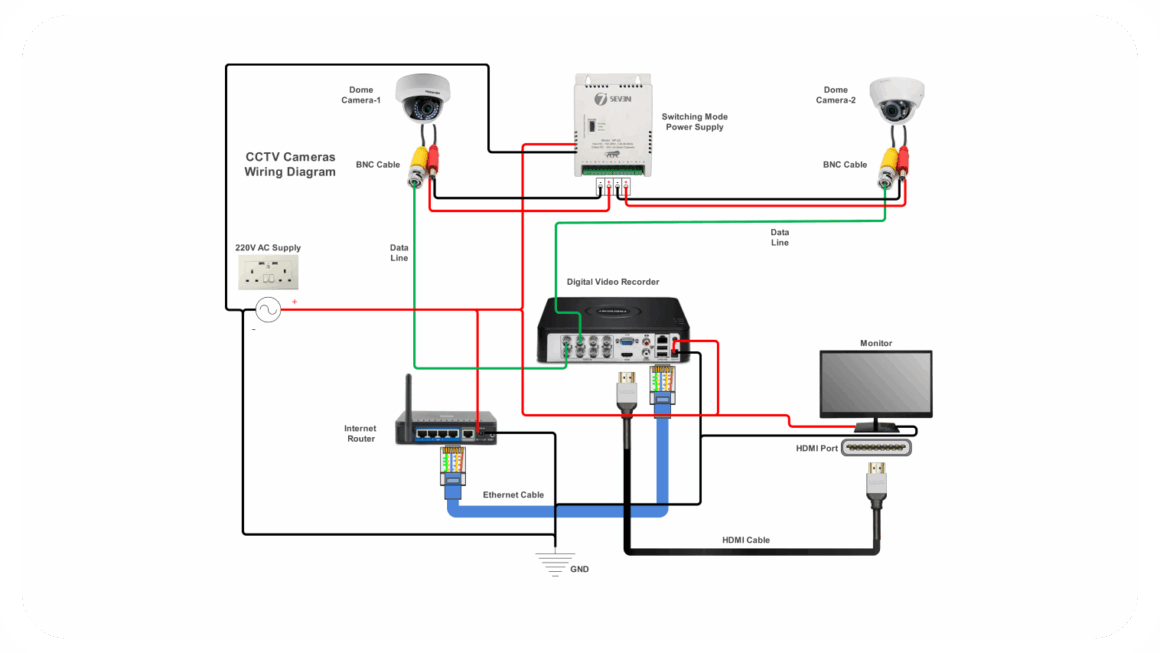
Are you looking to install a security camera system at home or in your office? If so, you may be wondering how to properly wire a 4 wire security camera. Understanding the wiring diagram is crucial to ensure the system functions properly and provides the security you need.
When it comes to wiring a 4 wire security camera, it’s important to follow a wiring diagram to ensure all connections are made correctly. By following the diagram, you can easily connect the camera to the power source, monitor, and recording device.

Related Post 6 Pin Throttle Position Sensor Wiring Diagram
Start by connecting the power adapter to the camera using the appropriate cables. Make sure to match the positive and negative terminals to avoid any issues with power supply. Next, connect the camera to the monitor and DVR using the designated cables according to the wiring diagram.
Once all connections have been made, double-check to ensure everything is securely in place. Test the system to make sure the camera is functioning properly and that the video feed is being displayed on the monitor. If everything is working as it should, you can now enjoy the added security and peace of mind that comes with a 4 wire security camera system.
In conclusion, wiring a 4 wire security camera may seem daunting at first, but with the right tools and guidance, it can be a straightforward process. By following the wiring diagram provided by the manufacturer and making sure all connections are secure, you can have a reliable security system up and running in no time.
Download and Print 4 Wire Security Camera Wiring Diagram Listed below