Are you looking for a 48V 48 volt golf cart battery wiring diagram? You’ve come to the right place! Whether you’re a beginner or an experienced DIY enthusiast, understanding how to wire your golf cart’s battery correctly is essential for optimal performance.
With the right wiring diagram, you can ensure that your golf cart’s battery is properly connected, preventing any potential issues down the road. Let’s dive into the details of a 48V 48 volt golf cart battery wiring diagram and how you can easily follow it.

Related Post Wiring Diagram Electric Trailer Brakes
Begin by disconnecting the battery cables and removing the old batteries. Then, carefully connect the new 48V batteries following the wiring diagram’s instructions. Double-check all connections to ensure everything is secure and properly connected.
Once you have completed the wiring process, test your golf cart to ensure everything is working correctly. Take your golf cart for a test drive to ensure that the battery is providing the necessary power for optimal performance.
By following a 48V 48 volt golf cart battery wiring diagram, you can ensure that your golf cart’s battery is properly connected and functioning as it should. With the right guidance and attention to detail, you can successfully wire your golf cart’s battery without any issues.
Now that you have a better understanding of how to wire your 48V golf cart battery, you can enjoy a smooth and hassle-free driving experience. Remember to refer back to the wiring diagram whenever needed and always prioritize safety when working with electrical components.
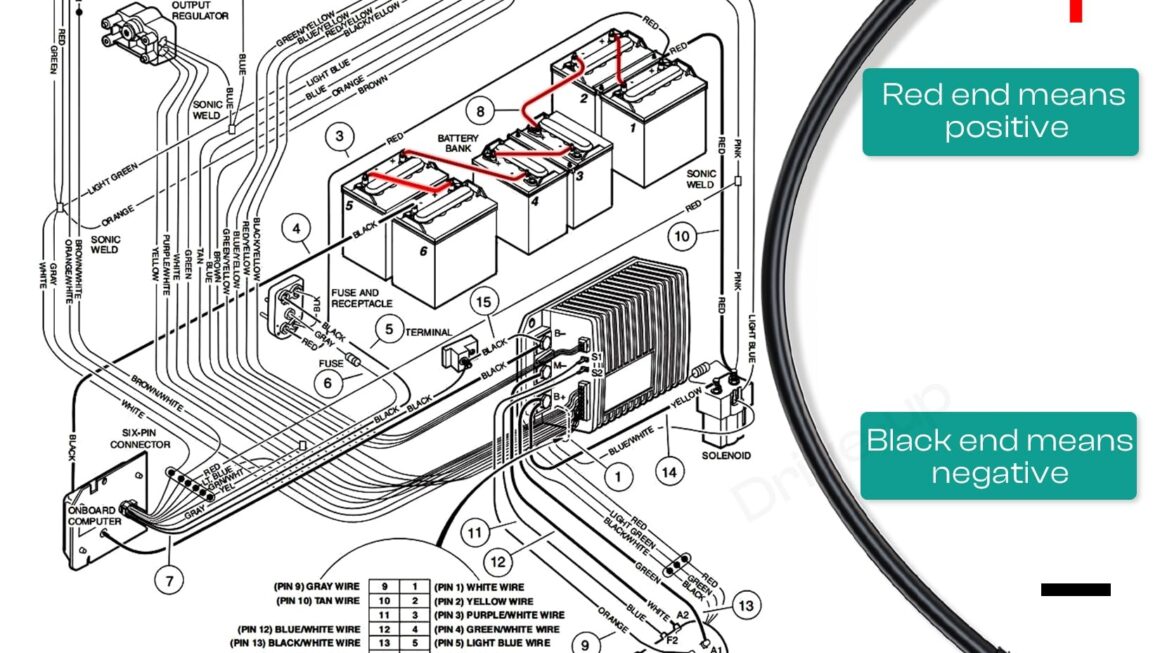
Download and Print 48V 48 Volt Golf Cart Battery Wiring Diagram Listed below