If you’re looking to wire up a 5 pin rocker switch, you’ve come to the right place! Whether you’re a DIY enthusiast or a professional electrician, understanding how to properly wire a rocker switch is essential.
With the right tools and a clear understanding of the wiring diagram, you can easily install a 5 pin rocker switch in no time. In this article, we’ll walk you through the process step by step, so you can confidently tackle this project on your own.

Related Post 5 Wire Trailer Wiring To 7 Pin Diagram
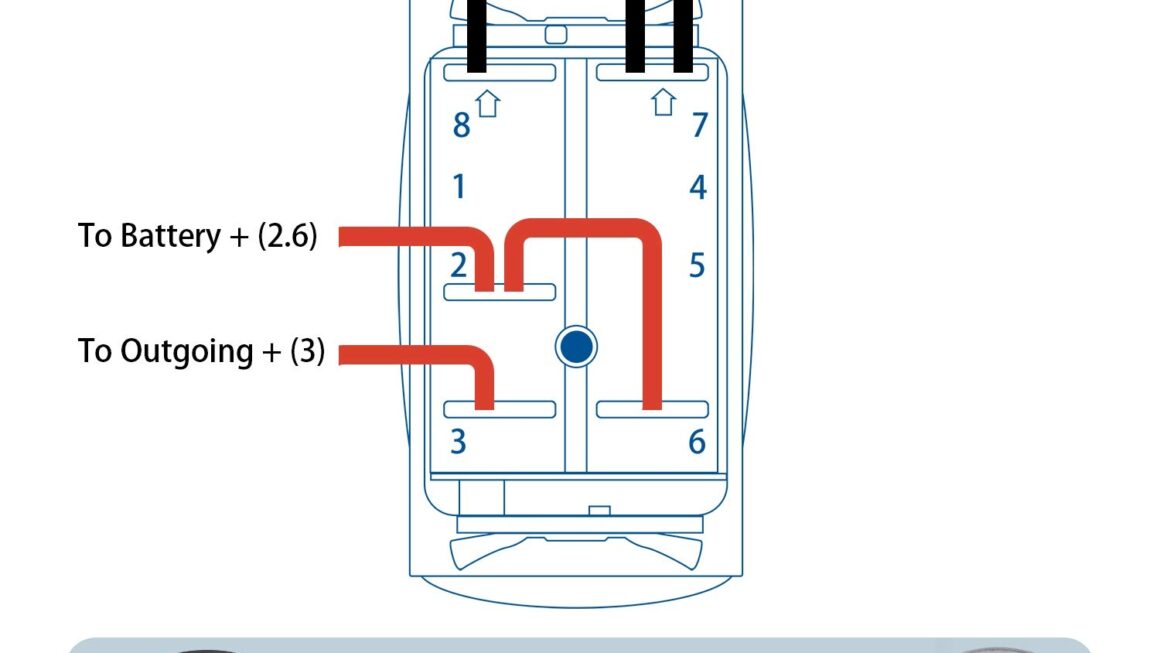
Start by identifying the power and ground terminals on the switch. The power terminal is where you’ll connect the incoming power source, while the ground terminal is where you’ll connect the ground wire. It’s essential to connect these two terminals correctly to ensure the switch functions properly.
Next, locate the accessory terminal, which is used to power the accessory or device connected to the switch. The light terminal controls the backlight on the switch, providing visual feedback when the switch is turned on. Finally, the output terminal sends power to the device being controlled by the switch.
Once you’ve identified and connected all five terminals according to the wiring diagram, it’s time to test the switch. Turn on the power source and toggle the switch to ensure it’s working correctly. If everything is functioning as it should, you’ve successfully wired up your 5 pin rocker switch!
In conclusion, understanding how to wire a 5 pin rocker switch is a valuable skill that can come in handy for a variety of projects. By following the wiring diagram and taking the time to connect each terminal correctly, you can confidently install a rocker switch with ease. So go ahead, grab your tools, and get ready to tackle your next electrical project!
Download and Print 5 Pin Rocker Switch Wiring Diagram Listed below