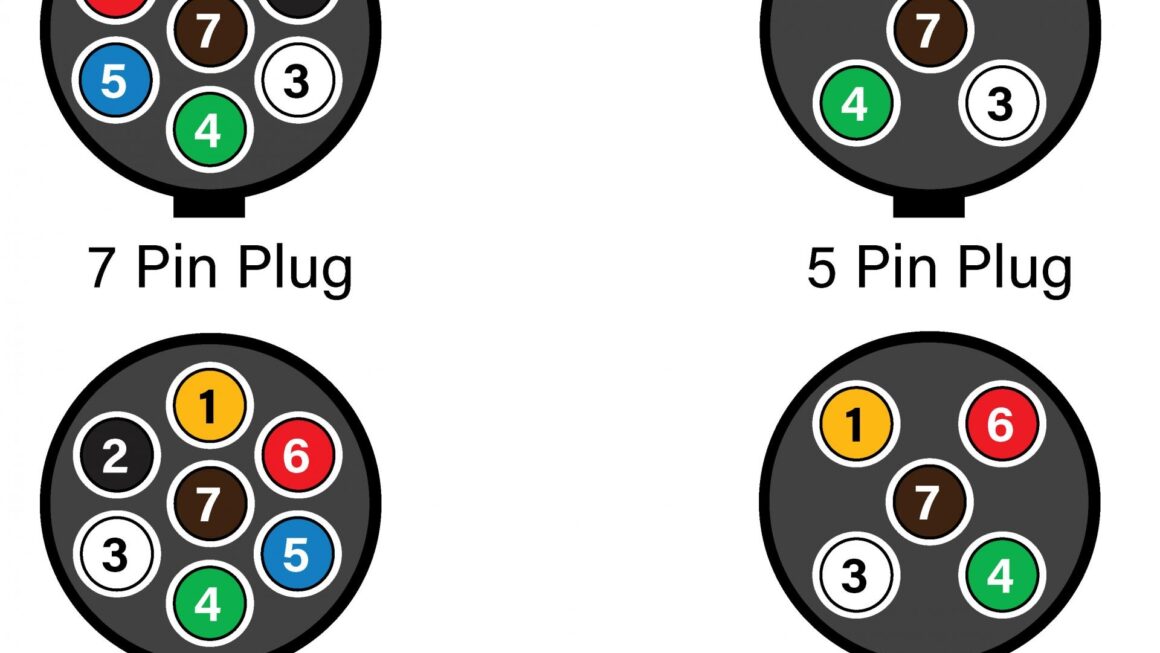
Are you looking to install a 5 plug trailer wiring diagram but not sure where to start? Don’t worry, we’ve got you covered! In this article, we will walk you through the steps to easily install a 5 plug trailer wiring diagram for your vehicle.
First things first, make sure you have all the necessary tools and materials on hand before starting the installation process. This includes a 5 plug trailer wiring harness, wire cutters, electrical tape, and a screwdriver.

Related Post Wiring Diagram For Western Plow
Next, connect the 5 plug trailer wiring harness to the connection point on your vehicle. Make sure to match the corresponding wires from the harness to the correct terminals on the connection point. Secure the connection by tightening any screws or bolts that may be present.
Once the wiring harness is securely connected, test the trailer lights to ensure they are functioning properly. Turn on the vehicle’s headlights, brake lights, and turn signals to make sure everything is working as it should.
Finally, tidy up any loose wires and secure them in place using electrical tape. This will help prevent any accidental damage to the wiring harness while driving. Congratulations, you have successfully installed a 5 plug trailer wiring diagram!
In conclusion, installing a 5 plug trailer wiring diagram is a straightforward process that can be easily done at home with the right tools and materials. Follow the steps outlined in this article, and you’ll be ready to hit the road with your trailer in no time. Happy towing!
Download and Print 5 Plug Trailer Wiring Diagram Listed below