Are you looking to install a 50 amp plug in your home or RV? Understanding the wiring diagram is crucial to ensure a safe and proper installation. In this article, we will break down the steps to help you with the process.
Before you begin, it’s important to gather all the necessary tools and materials for the job. You will need a 50 amp plug, wire strippers, electrical tape, and a screwdriver. Make sure to switch off the power supply before starting any work.

Related Post Wiring Diagram For Golf Cart Batteries
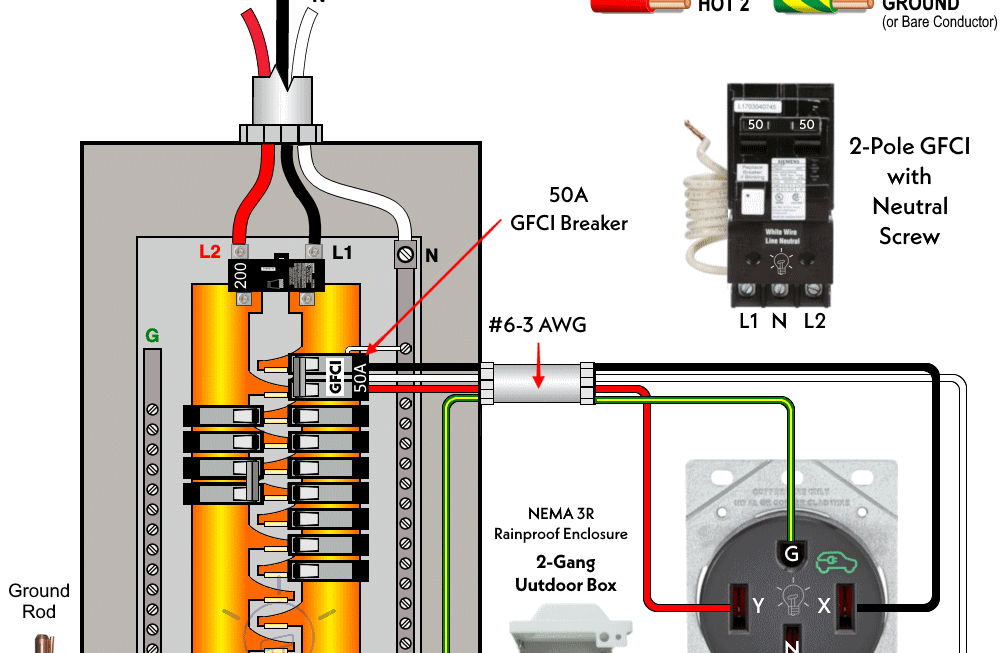
Next, strip the insulation off the ends of the wires and connect them to the corresponding terminals on the plug. The black and red wires go to the hot terminals, the white wire goes to the neutral terminal, and the green or bare copper wire goes to the ground terminal.
Once the wires are securely connected, tighten the screws on the terminals to secure the connections. Make sure there are no loose wires or exposed conductors. Finally, double-check your work and switch on the power to test the plug.
It’s always a good idea to have a professional electrician inspect your work to ensure it meets safety standards. Remember, working with electricity can be dangerous, so it’s better to be safe than sorry. Following the wiring diagram carefully will help you avoid any potential hazards.
In conclusion, understanding the 50 amp plug wiring diagram is essential for a successful installation. By following the steps outlined in this article, you can confidently install a 50 amp plug in your home or RV. Stay safe and happy wiring!
Download and Print 50 Amp Plug Wiring Diagram Listed below