If you’re looking to install a 6 pin power window switch but are unsure about the wiring, you’ve come to the right place. In this article, we’ll provide you with a detailed wiring diagram to help you complete the installation process smoothly.
Wiring a 6 pin power window switch may seem daunting at first, but with the right guidance, it can be a straightforward task. By following our step-by-step instructions, you’ll be able to successfully wire the switch and enjoy the convenience of power windows in your vehicle.

Related Post Wiring Diagram Of Trailer Plug
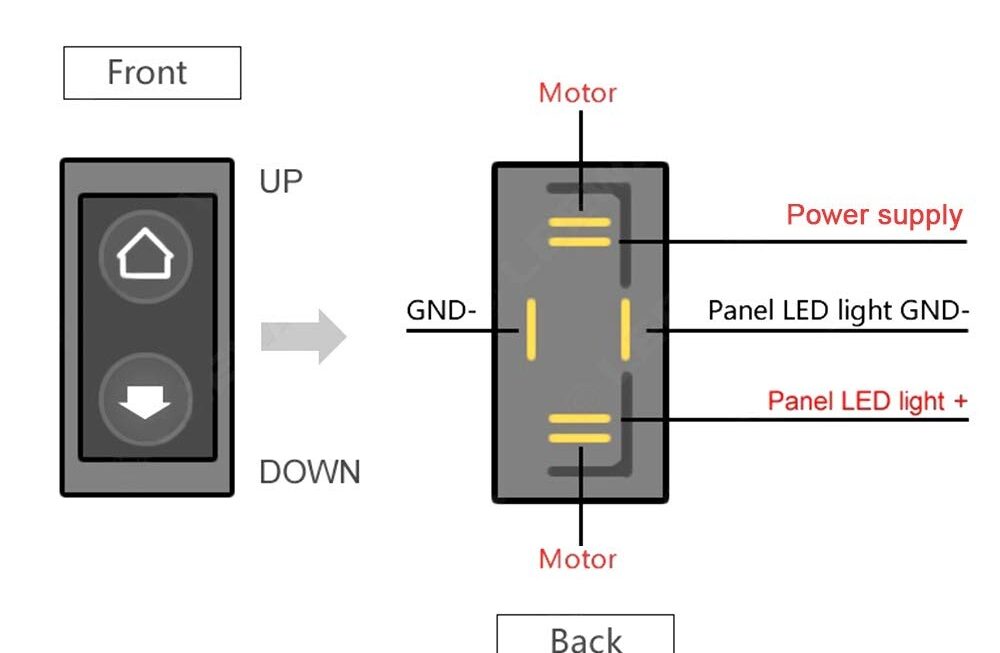
6 Pin Power Window Switch Wiring Diagram
Before you begin the wiring process, make sure you have the necessary tools and materials on hand. You’ll need a wiring diagram specific to your vehicle’s make and model, a multimeter, wire strippers, electrical tape, and connectors. It’s also important to disconnect the vehicle’s battery before starting the installation.
Start by identifying the wires that correspond to each pin on the power window switch. Use a multimeter to test the continuity of each wire to determine which ones control the up, down, and other functions of the window. Once you’ve identified the correct wires, use wire strippers to remove the insulation and connect them to the corresponding terminals on the switch.
After connecting the wires, use electrical tape to secure the connections and prevent any short circuits. Test the power window switch to ensure that it functions correctly. If everything is working as it should, you can reassemble any panels or covers that were removed during the installation process.
By following this wiring diagram and our instructions, you’ll be able to successfully install a 6 pin power window switch in your vehicle. Enjoy the convenience of power windows and the satisfaction of completing the installation yourself!
Download and Print 6 Pin Power Window Switch Wiring Diagram Listed below