Looking to install a 6 pin rocker switch but not sure how to wire it up? You’ve come to the right place! In this article, we’ll walk you through a simple wiring diagram to help you get your rocker switch up and running in no time.
Whether you’re a DIY enthusiast or just looking to add some functionality to your project, understanding how to wire a 6 pin rocker switch is essential. By following our step-by-step guide, you’ll be able to wire up your switch with ease.

Related Post 120V Intermatic Timer Wiring Diagram
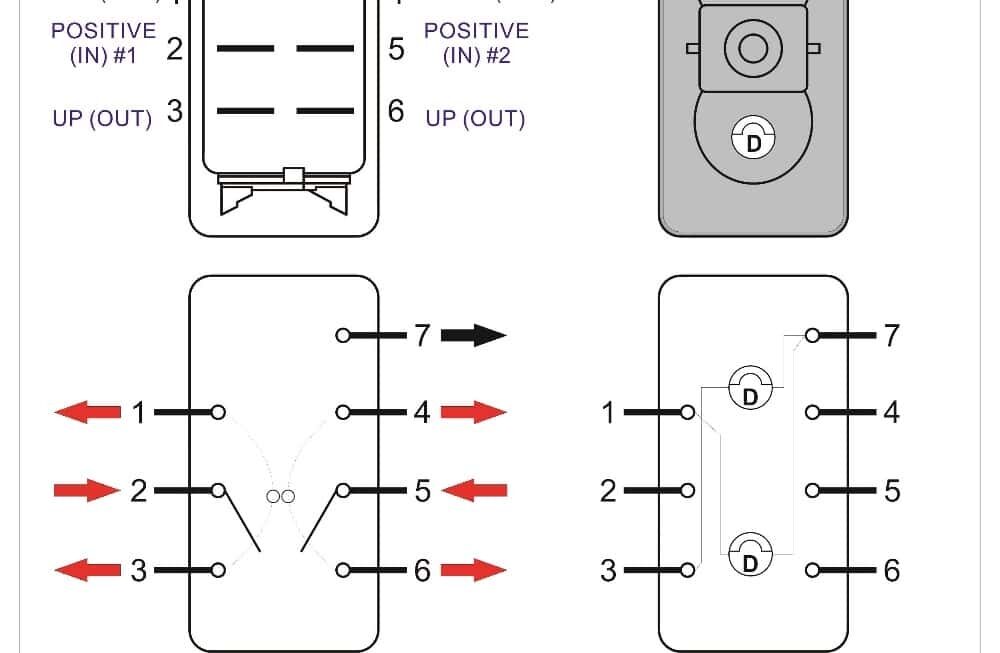
6 Pin Rocker Switch Wiring Diagram
First, identify the six pins on your rocker switch. You’ll typically find two pins for the power source, two for the accessory you want to control, and two for ground. Once you’ve located these pins, it’s time to start wiring.
Start by connecting the power source to one of the power pins on the switch. Then, connect the accessory you want to control to the corresponding pins. Finally, connect the ground wire to the ground pins on the switch. Once everything is connected, test your switch to ensure it’s working properly.
It’s important to remember to always disconnect the power source before wiring up your rocker switch to avoid any accidents. Additionally, make sure to follow the wiring diagram specific to your switch to ensure proper functionality.
With this simple wiring diagram, you’ll be able to install your 6 pin rocker switch in no time. Whether you’re adding a new feature to your vehicle or upgrading your DIY project, understanding how to wire a rocker switch is a valuable skill to have.
Now that you have a better understanding of how to wire a 6 pin rocker switch, you can confidently tackle your next project. With the right tools and knowledge, you’ll be able to customize your setup and add functionality with ease. Happy wiring!
Download and Print 6 Pin Rocker Switch Wiring Diagram Listed below