If you’re looking to connect your trailer to your vehicle, you’ll need to know how to wire a 6 pin trailer connector. This simple guide will walk you through the process step by step.
Whether you’re a beginner or an experienced DIYer, understanding the wiring diagram for a 6 pin trailer connector is essential. By following these instructions, you’ll be able to safely and securely connect your trailer for your next adventure.

Related Post Wiring Diagram For A Ford Starter Solenoid
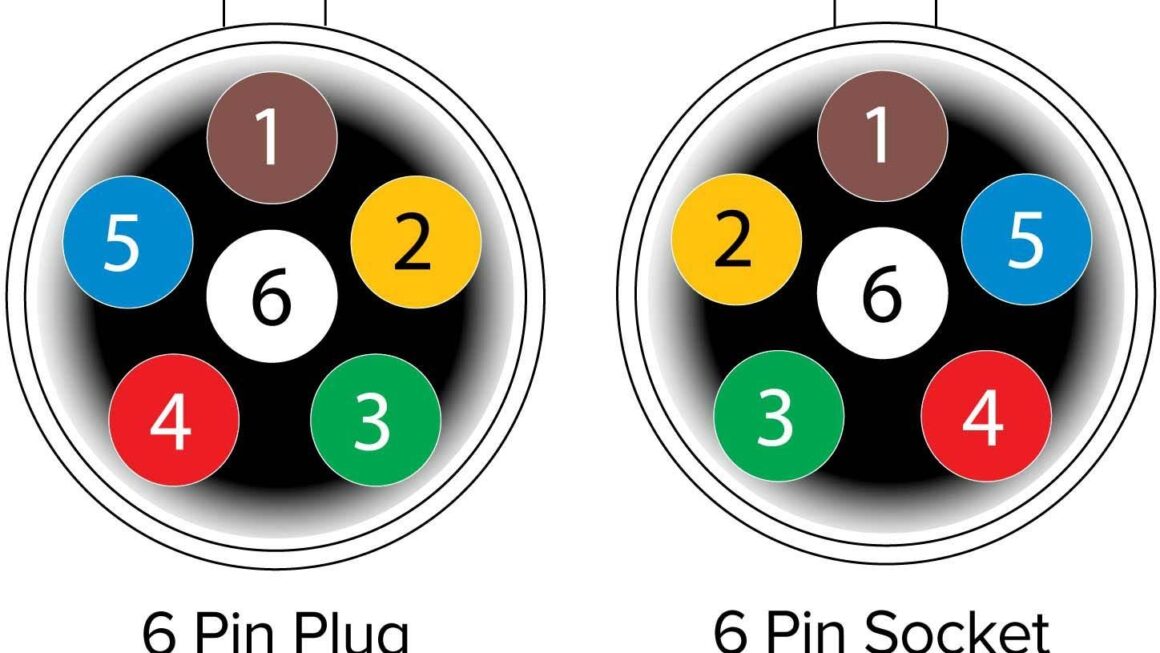
Next, identify the color-coding of the wires on both the trailer connector and your vehicle’s wiring harness. Match the corresponding wires together – for example, connect the white wire to the white wire, the green wire to the green wire, and so on. This will ensure a proper connection.
Once you’ve matched up all the wires, use the wire strippers to strip a small portion of the insulation off each wire. Twist the exposed copper wire to prevent fraying, then securely connect each wire using the appropriate connectors. Double-check your connections to ensure everything is properly in place.
After all the wires are connected, use the voltage tester to check for continuity and ensure there are no shorts in the wiring. Once you’ve verified that everything is working correctly, use electrical tape to secure and protect the connections. Your 6 pin trailer connector should now be wired and ready to use.
Now that you’ve successfully wired your 6 pin trailer connector, you can confidently hook up your trailer and hit the road. Remember to always double-check your connections and test the lights before setting off on your journey. Safe travels!
Download and Print 6 Pin Trailer Connector Wiring Diagram Listed below