If you’re looking to wire up a 7 blade trailer plug, you’ve come to the right place! Whether you’re a seasoned pro or a newbie DIYer, we’ve got you covered with this easy-to-follow guide.
Having a solid understanding of how to wire your trailer plug is crucial for safe and efficient towing. With the right tools and a bit of know-how, you’ll be ready to hit the road in no time!

Related Post Wiring Diagram For 5 Pin Rocker Switch
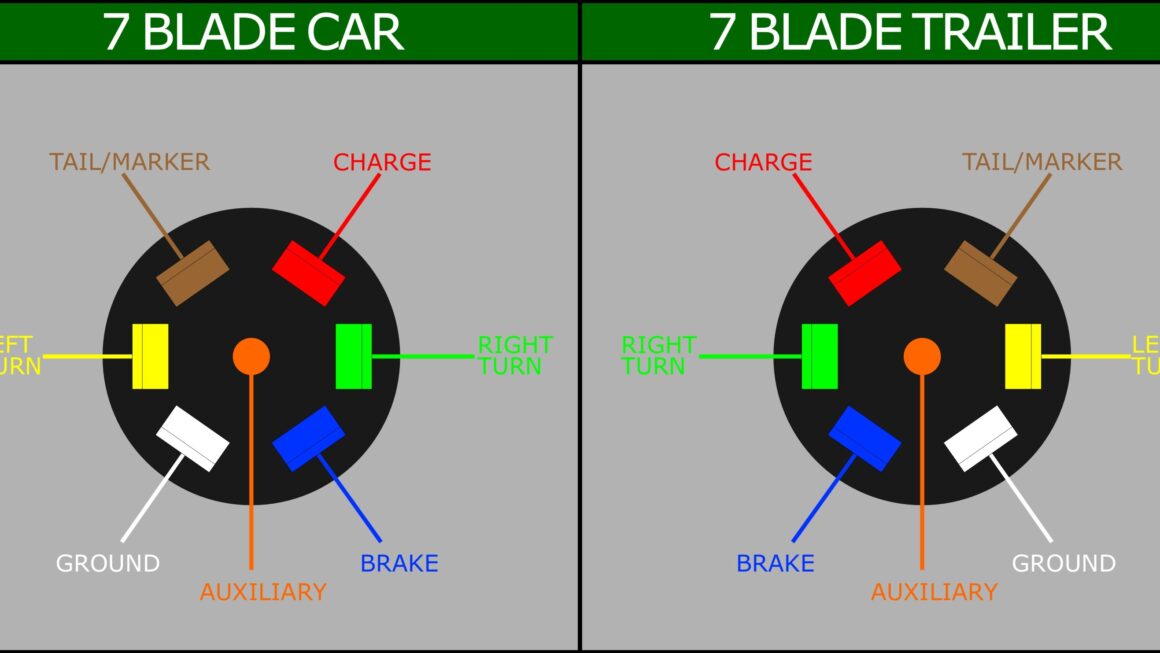
Start by identifying the terminals on your trailer plug. There should be seven in total, each labeled with a number. Refer to your wiring diagram to determine which wire goes to each terminal. This step is crucial for ensuring proper functionality.
Next, strip the insulation off the ends of your trailer wires and connect them to the corresponding terminals on the plug. Use your voltage tester to double-check that everything is connected correctly and that there are no loose connections.
Once you’ve confirmed that all the wires are securely connected, use electrical tape to wrap each connection individually. This will help prevent any moisture or debris from causing a short circuit down the line.
Finally, give everything one last once-over to make sure all connections are secure and tidy. Once you’re satisfied with your work, you’re ready to test out your newly wired 7 blade trailer plug. Hook it up to your vehicle and trailer, and you should be good to go!
With this handy guide, you’ll be able to tackle your 7 blade trailer plug wiring with confidence. Remember to always prioritize safety and double-check your work before hitting the road. Happy towing!
Download and Print 7 Blade Trailer Plug Wiring Diagram Listed below