If you’re looking for a clear and detailed guide on how to wire your Ademco Vista 20P system, you’ve come to the right place. We’ll walk you through the process step by step, making it easy for you to set up your security system.
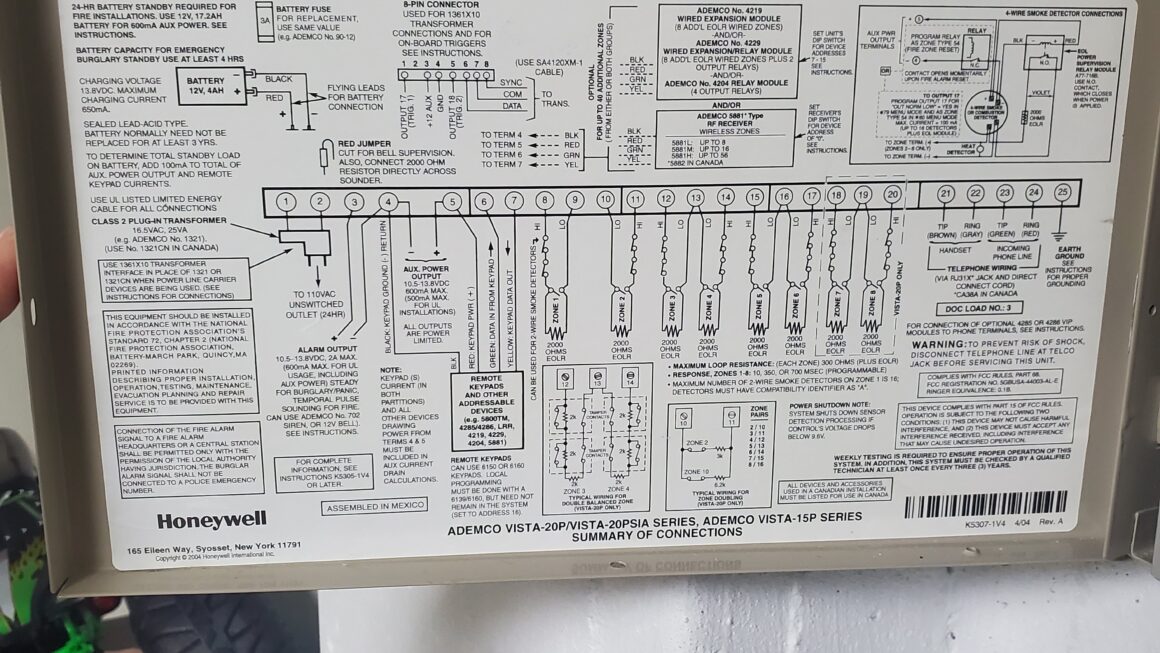
Understanding the wiring diagram for your Ademco Vista 20P is crucial to ensure that everything is properly connected and functioning. With the right information at your fingertips, you can confidently tackle this project on your own.

Related Post 2 Wire Temp Sensor Wiring Diagram
Next, carefully study the wiring diagram to familiarize yourself with the different components and their corresponding connections. Take your time to understand how each part works together to ensure a smooth installation process.
Begin by connecting the power source to the main control panel following the guidelines outlined in the wiring diagram. Double-check each connection to ensure they are secure and properly insulated to prevent any electrical issues down the line.
Once the power source is successfully connected, proceed to wire the various sensors, keypads, and other peripherals according to the diagram. Take your time with each step, ensuring that each connection is made correctly to avoid any potential malfunctions in the system.
After completing all the necessary connections, power up your Ademco Vista 20P system and perform a thorough test to ensure everything is working as intended. Make any necessary adjustments as needed and enjoy the peace of mind that comes with a properly installed security system.
With this comprehensive guide, you’ll have all the information you need to successfully wire your Ademco Vista 20P system. By following the wiring diagram and taking your time with each step, you can ensure a smooth and hassle-free installation process. Now, sit back, relax, and enjoy the added security and protection that your new system provides.
Download and Print Ademco Vista 20P Wiring Diagram Listed below