When it comes to understanding your car’s electrical system, having a good alternator wiring diagram is crucial. Whether you’re a DIY enthusiast or a professional mechanic, knowing how to properly wire your alternator can save you time and headaches down the road.
With the right knowledge and tools, you can easily wire a 3-wire alternator in no time. In this article, we’ll walk you through the process of wiring your alternator correctly to ensure your car’s electrical system works properly.

Related Post Start Stop Station Wiring Diagram
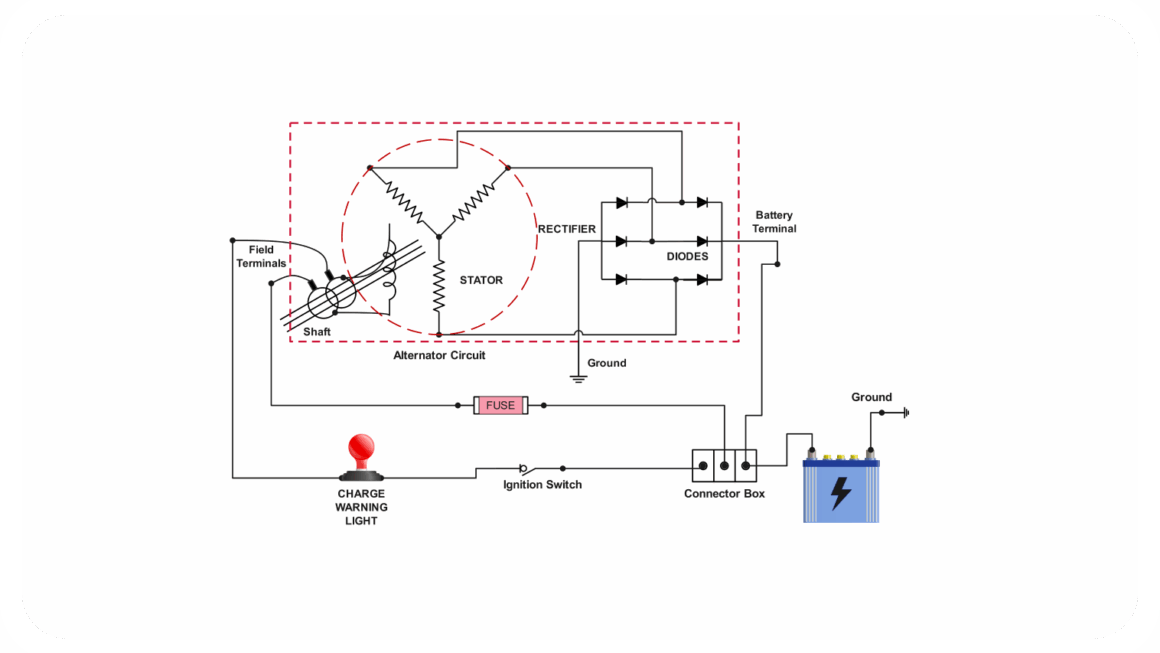
Start by disconnecting the negative terminal of your car’s battery to prevent any electrical mishaps. Then, locate your alternator and identify the three terminals: the B+ terminal, the S terminal, and the L terminal. Refer to your alternator wiring diagram to ensure you’re connecting the wires to the correct terminals.
Next, use your wire strippers to strip the ends of the wires that will be connected to the alternator. Connect the wire from the B+ terminal to the positive terminal of your battery, the wire from the S terminal to the ignition switch, and the wire from the L terminal to the warning light or gauge in your car.
Once you’ve connected all the wires according to the alternator wiring diagram, double-check your connections to ensure everything is secure. Reconnect the negative terminal of your battery and start your car to test the alternator’s functionality. If everything is working properly, you’re all set!
In conclusion, understanding how to wire a 3-wire alternator is essential for maintaining your car’s electrical system. By following the steps outlined in this article and using the correct alternator wiring diagram, you can ensure your car runs smoothly and efficiently. Happy wiring!
Download and Print Alternator Wiring Diagram 3 Wire Listed below