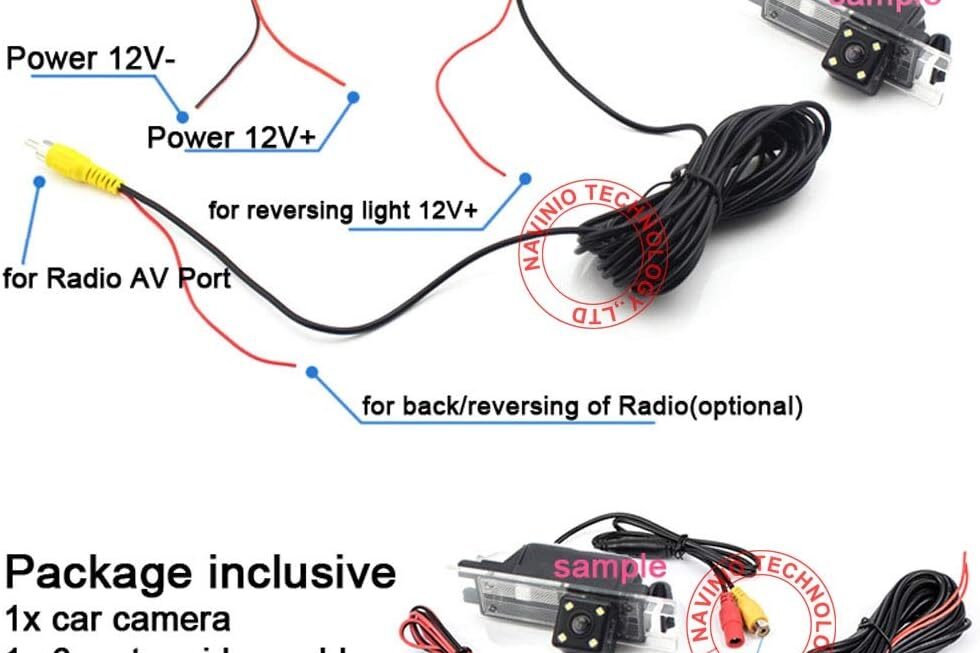
Are you looking to install a back-up camera in your vehicle but are unsure about the wiring diagram? Look no further! In this article, we will guide you through the process of installing a back-up camera with a detailed wiring diagram.
Having a back-up camera in your vehicle can provide added safety and convenience, especially when parking in tight spaces or reversing. By following the wiring diagram, you can easily install the camera yourself and enjoy the benefits it offers.

Related Post 3 Wire Starter Wiring Diagram
Start by identifying the power source for the camera, typically the reverse light or a separate power supply. Then, connect the power and ground wires from the camera to the designated ports on the display unit. Make sure to follow the color-coding on the wiring diagram for accurate connections.
Next, you will need to run the video cable from the camera to the display unit. Secure the cable along the vehicle’s interior to prevent any interference or damage. Once the video cable is connected, test the camera to ensure it is functioning correctly before finalizing the installation.
By following the back-up camera wiring diagram carefully, you can successfully install the camera in your vehicle without any hassle. Remember to double-check all connections and test the camera before putting everything back together. With a little patience and attention to detail, you can enjoy the added convenience and safety of a back-up camera in no time!
Now that you have a better understanding of the back-up camera wiring diagram, you can confidently proceed with the installation process. Take your time, follow the steps outlined in the diagram, and enjoy the benefits of having a back-up camera in your vehicle. Happy installing!
Download and Print Back Up Camera Wiring Diagram Listed below