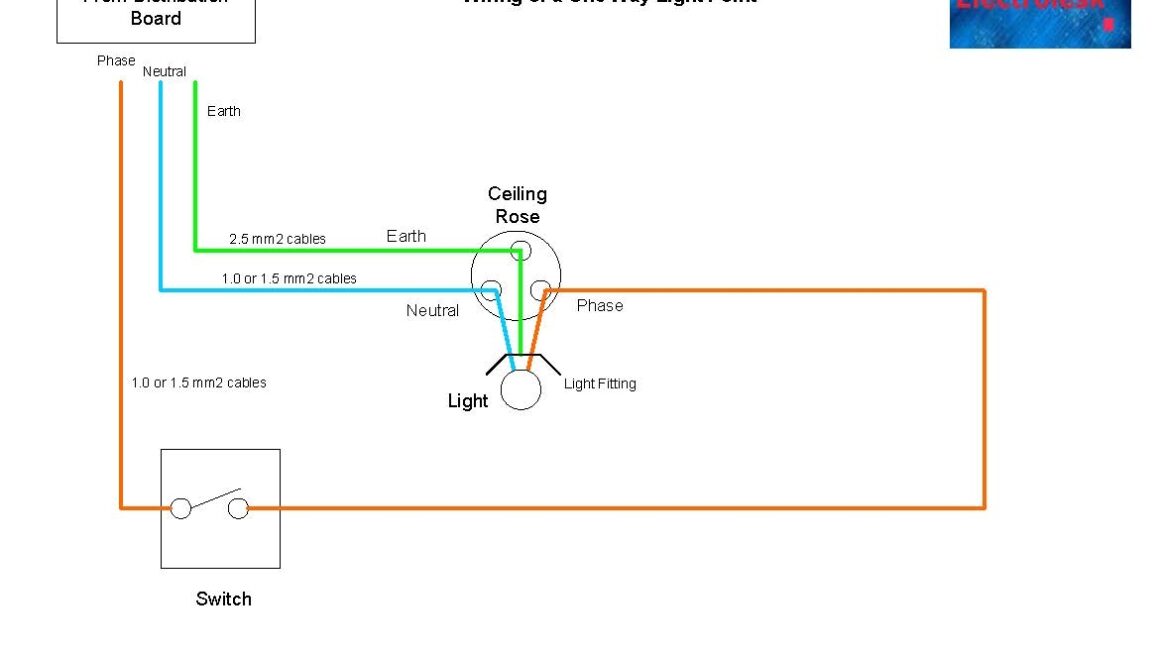
Are you looking to install a light switch in your home but not sure where to start? Understanding a basic wiring diagram for a light switch can help you tackle this DIY project with confidence. With a few simple steps, you can have a new light switch up and running in no time!
Before diving into the wiring process, it’s important to gather the necessary tools and materials. You’ll need a screwdriver, wire stripper, electrical tape, and of course, the new light switch. Make sure to turn off the power to the circuit you’ll be working on to avoid any accidents.

Related Post 6 Way Trailer Connector Wiring Diagram
Next, disconnect the wires from the old switch by loosening the terminal screws and removing the wires. Then, connect the corresponding wires to the new light switch. The black wire goes to the brass or black screw, the white wire goes to the silver or light-colored screw, and the green or bare copper wire goes to the green screw.
Once the wires are securely connected, carefully tuck them back into the electrical box and screw the new light switch into place. Replace the cover and turn the power back on to test the switch. If done correctly, your new light switch should be working perfectly, illuminating your space with ease.
Remember, safety always comes first when working with electricity. If you’re unsure about any step in the process, don’t hesitate to call a professional electrician for assistance. With a basic understanding of a wiring diagram for a light switch, you can confidently tackle this project and enhance the lighting in your home.
In conclusion, mastering a basic wiring diagram for a light switch is a valuable skill for any homeowner. With the right tools, materials, and know-how, you can easily upgrade the lighting in your space and add a personal touch to your home decor. So, roll up your sleeves and get ready to shine some light on your living space!
Download and Print Basic Wiring Diagram For Light Switch Listed below