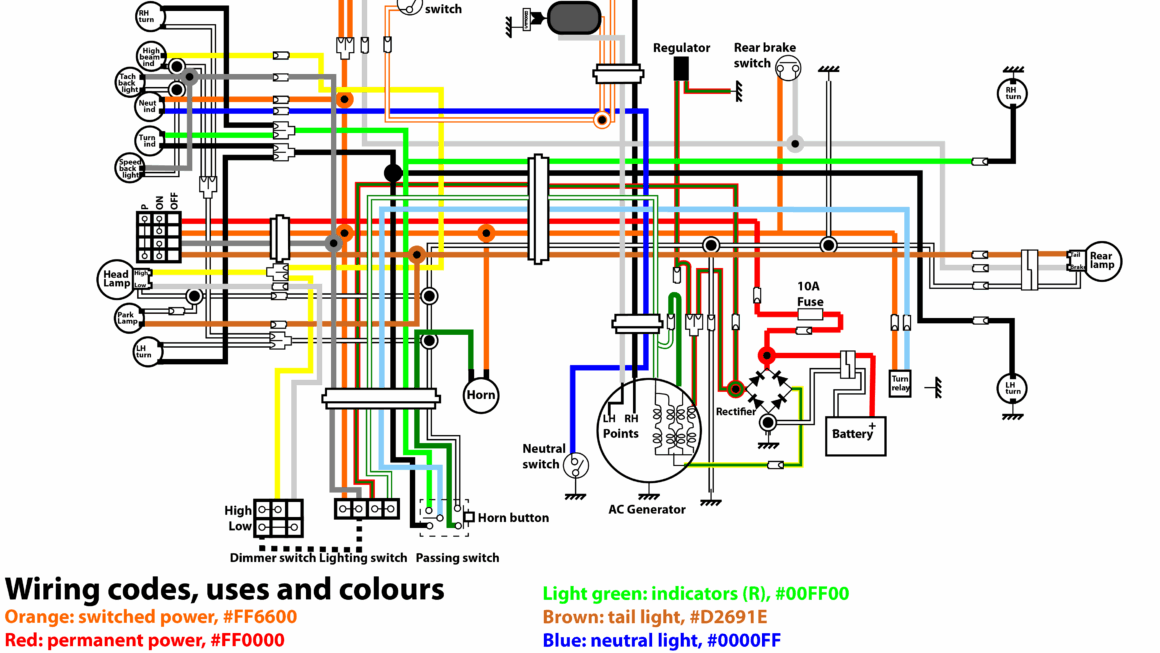
If you’re a Suzuki motorcycle owner looking to do some wiring work on your bike, understanding the color codes in the wiring diagram is crucial. It can be a bit overwhelming at first, but once you get the hang of it, it’s actually quite simple!
Each wire in the diagram is color-coded to help you easily identify which wire does what. This makes it much easier to troubleshoot any electrical issues that may arise and make modifications to your bike without any confusion.

Related Post Wiring Diagram For Boss Snow Plow
Bike Color Codes: Simple Suzuki Motorcycle Wiring Diagram
For Suzuki motorcycles, the color codes typically follow a standard pattern. For example, black wires are usually used for ground connections, while red wires are often used for power supply. Understanding these basic color codes can save you a lot of time and headaches when working on your bike.
It’s important to note that not all manufacturers use the same color-coding system, so it’s essential to refer to your specific bike’s wiring diagram to ensure accuracy. This will help you avoid any costly mistakes and ensure that your wiring work is done correctly the first time.
When working with the wiring diagram, take your time to familiarize yourself with the color codes and what each wire represents. This will help you work more efficiently and confidently, knowing that you’re making the right connections and avoiding any potential issues down the road.
In conclusion, understanding the color codes in a Suzuki motorcycle wiring diagram is essential for any bike owner looking to do their own electrical work. By following the standard color-coding system and referring to your specific bike’s diagram, you can tackle wiring tasks with ease and confidence.
Download and Print Bike Color Codes Simple Suzuki Motorcycle Wiring Diagram Listed below