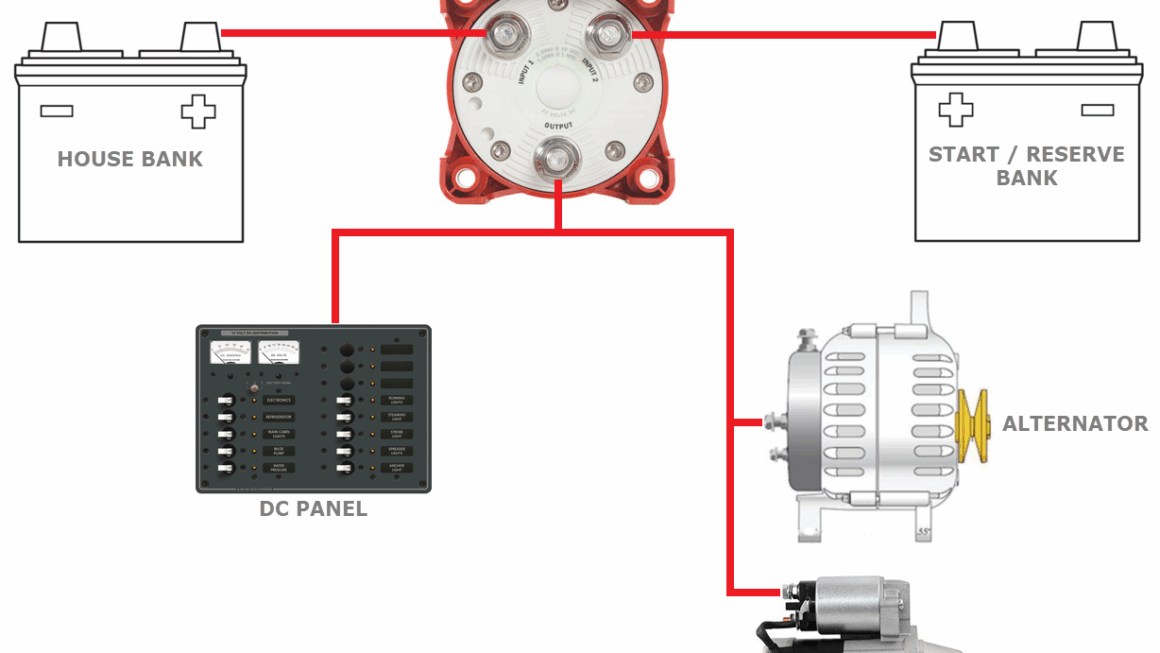
Are you looking to upgrade your boat’s electrical system with a dual battery setup? Making sure you have the right wiring diagram is crucial to ensure everything is connected properly and functions smoothly.
Whether you’re a seasoned boater or new to the world of marine electronics, understanding how to wire your boat’s dual battery system is essential. With the right diagram and a bit of know-how, you can easily tackle this project and enjoy reliable power on the water.

Related Post 48V 48 Volt Golf Cart Battery Wiring Diagram
When it comes to wiring your boat’s dual battery system, safety should always be a top priority. Make sure to follow all manufacturer guidelines and use marine-grade components to prevent any potential hazards. Proper insulation and secure connections are key to a successful installation.
One common wiring diagram for a boat’s dual battery system involves connecting the batteries in parallel. This setup allows both batteries to be charged simultaneously while providing additional power for your onboard electronics. Consult your boat’s manual or a professional to ensure you’re following the correct diagram for your specific setup.
Once you have the proper diagram in hand, it’s time to roll up your sleeves and get to work. Take your time to carefully route the cables, connect the components, and test the system before hitting the water. A well-executed wiring job will not only keep your boat running smoothly but also give you peace of mind during your adventures.
In conclusion, upgrading your boat with a dual battery system can enhance your boating experience and provide added reliability on the water. By following the right wiring diagram and taking the necessary precautions, you can enjoy seamless power distribution and worry-free outings. So, gather your tools, grab that diagram, and get ready to take your boat to the next level!
Download and Print Boat Dual Battery Wiring Diagram Listed below