Looking to upgrade your car audio system? One essential component you may want to consider is a bridged 4 channel amp. This type of amp can provide more power and better sound quality for your speakers.
But before you can enjoy the benefits of a bridged 4 channel amp, you’ll need to know how to wire it correctly. In this article, we’ll provide you with a detailed wiring diagram to help you set up your amp like a pro.

Related Post Wiring Diagram For A 50 Amp Rv Plug
Next, you’ll want to locate a suitable location to mount the amp in your car. Ideally, you’ll want to place it in a well-ventilated area to prevent overheating. Once you’ve found the perfect spot, securely mount the amp using screws or mounting brackets.
Now it’s time to connect the amp to your car’s stereo system. Start by connecting the RCA cables from the stereo to the input channels on the amp. Then, connect the speaker wires from the amp to the speakers in your car. Make sure to follow the wiring diagram carefully to avoid any mistakes.
Finally, you’ll need to connect the power and ground wires to the amp. The power wire should be connected to the positive terminal of your car’s battery, while the ground wire should be connected to a metal part of your car’s chassis. Once everything is connected, double-check your wiring to ensure everything is secure and properly connected.
With your bridged 4 channel amp properly wired and installed, you can now enjoy a more powerful and better-sounding audio experience in your car. So crank up the volume and hit the road with your favorite tunes playing loud and clear!
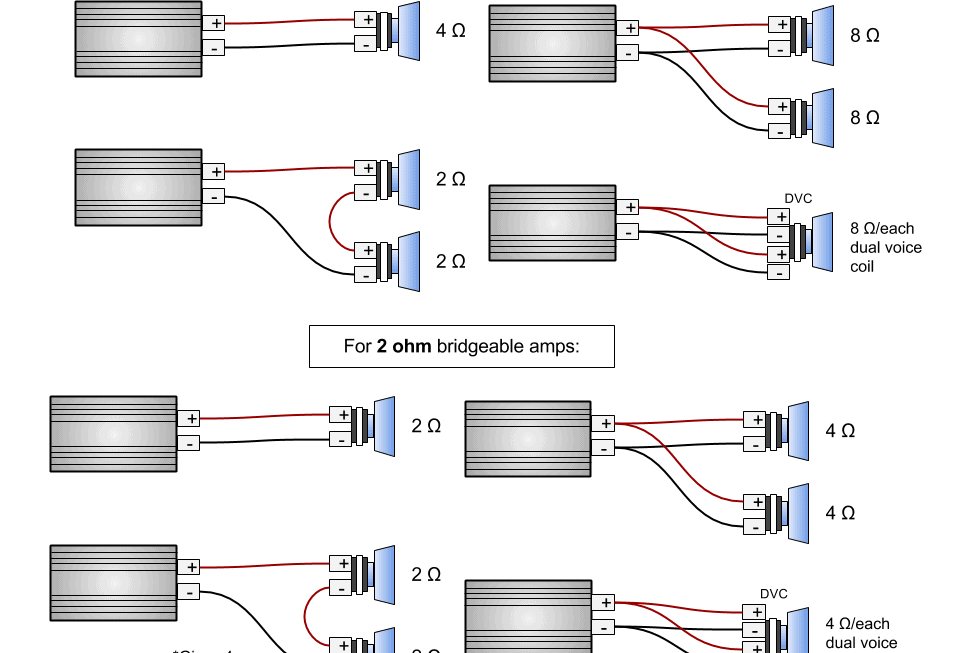
Download and Print Bridged 4 Channel Amp Wiring Diagram Listed below