Looking to upgrade your car audio system? One important component to consider is the car audio capacitor. It helps to stabilize voltage and provide extra power when needed, resulting in cleaner and more consistent sound.
However, installing a car audio capacitor requires proper wiring to ensure it functions correctly. Without the right wiring diagram, you may encounter issues such as electrical shorts or system malfunctions. To help you with this, we’ve put together a simple guide on car audio capacitor wiring diagram.

Related Post Gm 1 Wire Alternator Wiring Diagram
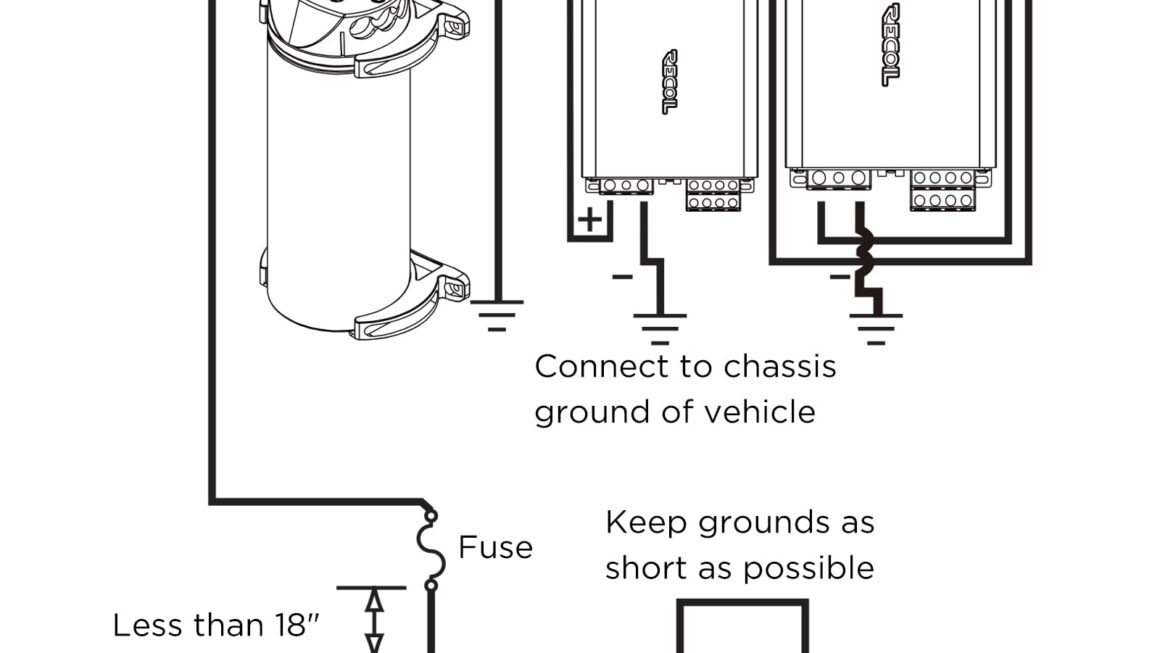
Next, connect the positive terminal of the capacitor to the main power wire coming from the battery using a ring terminal. Ensure a secure connection to prevent any loose wiring. Then, connect the negative terminal of the capacitor to the car’s chassis using a separate ground wire.
After securing the capacitor in place, connect the remote turn-on wire from the amplifier to the remote terminal on the capacitor. This allows the capacitor to turn on/off with the amplifier, ensuring optimal performance. Finally, double-check all connections and secure them properly before reattaching the car battery.
With the wiring complete, you can now enjoy the benefits of a car audio capacitor in your system. Experience improved sound quality, reduced distortion, and enhanced bass response. Don’t forget to regularly check the capacitor’s voltage levels to ensure it’s functioning correctly.
By following this simple car audio capacitor wiring diagram, you can upgrade your car audio system with ease. Enjoy a cleaner and more powerful sound experience on the road. Happy listening!
Download and Print Car Audio Capacitor Wiring Diagram Listed below